User Guide
Documentation
Everything you need to get the most out of the Forsnaps platform — organised around your working day, with the app's real screens.
Start reading Frequently asked questionsContents
For everyone: how to sign in, what you see in the home menu and why each profile sees different apps.
1 Getting started
Browser access
Chrome, Firefox, Safari or Edge — on a computer, tablet or phone
Mobile app
Android and iOS, with offline clock-in and notifications on your phone
Secure
Encrypted connection (HTTPS) and data hosted in the European Union
How to sign in
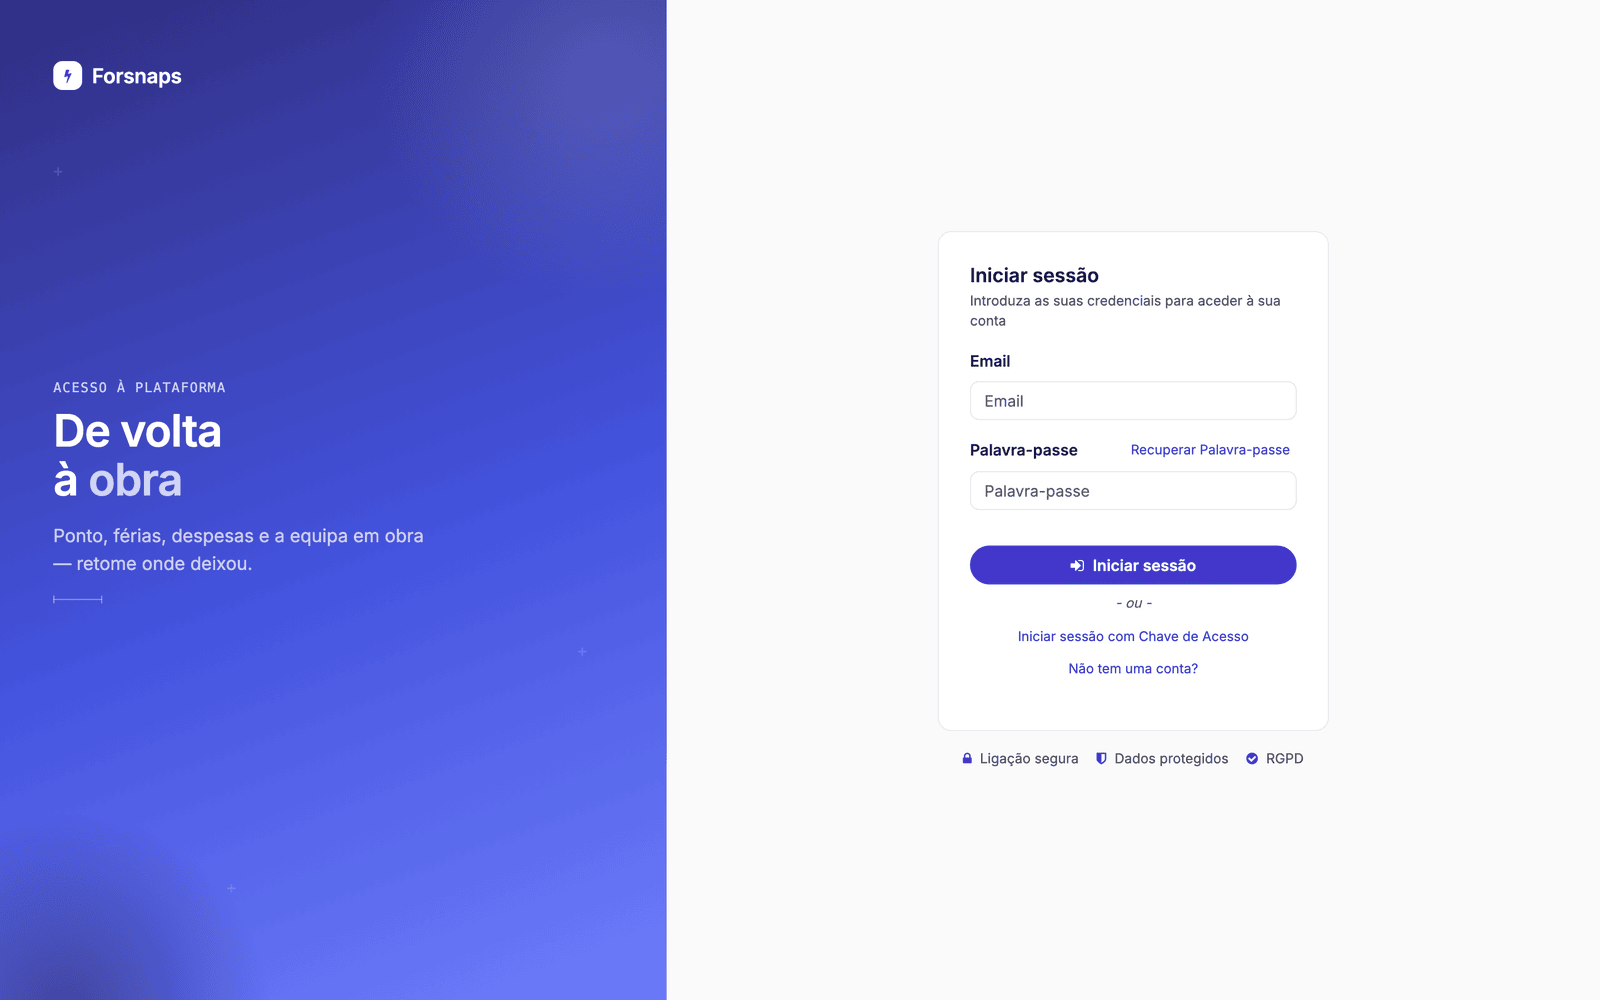
- Open your company's address (the company name followed by
.forsnaps.com) in your browser or in the mobile app. - Enter your email and password and click “Sign in”.
- You land on the home menu, with the apps your profile has access to.
2 Home menu, profiles and navigation
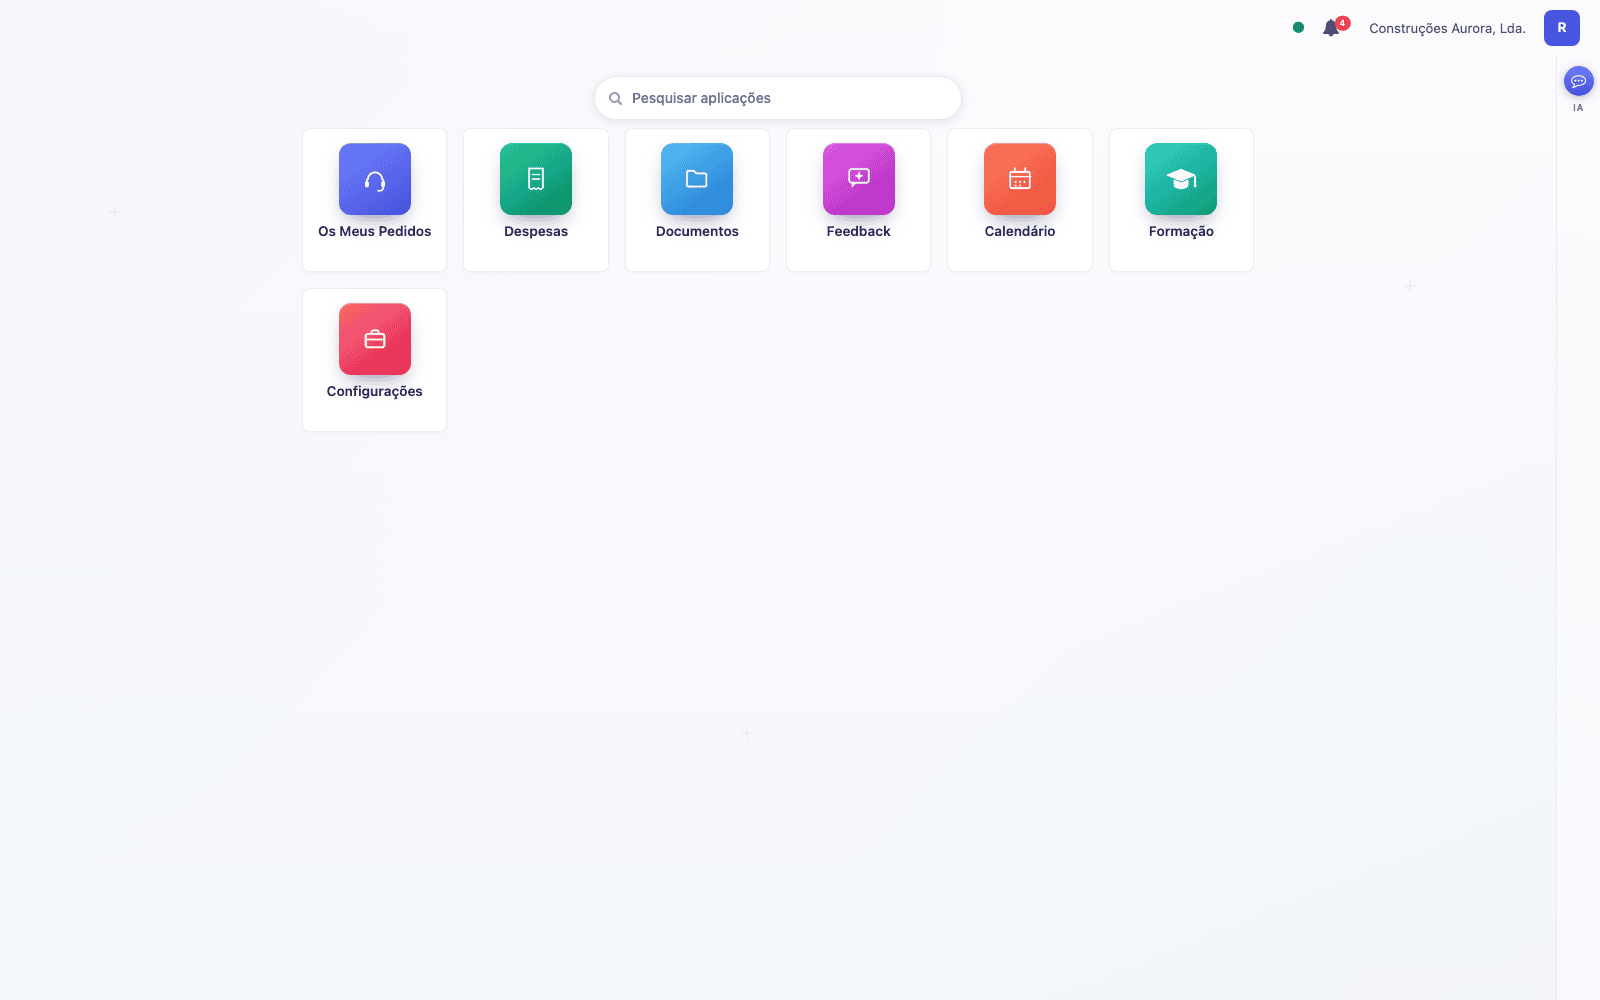
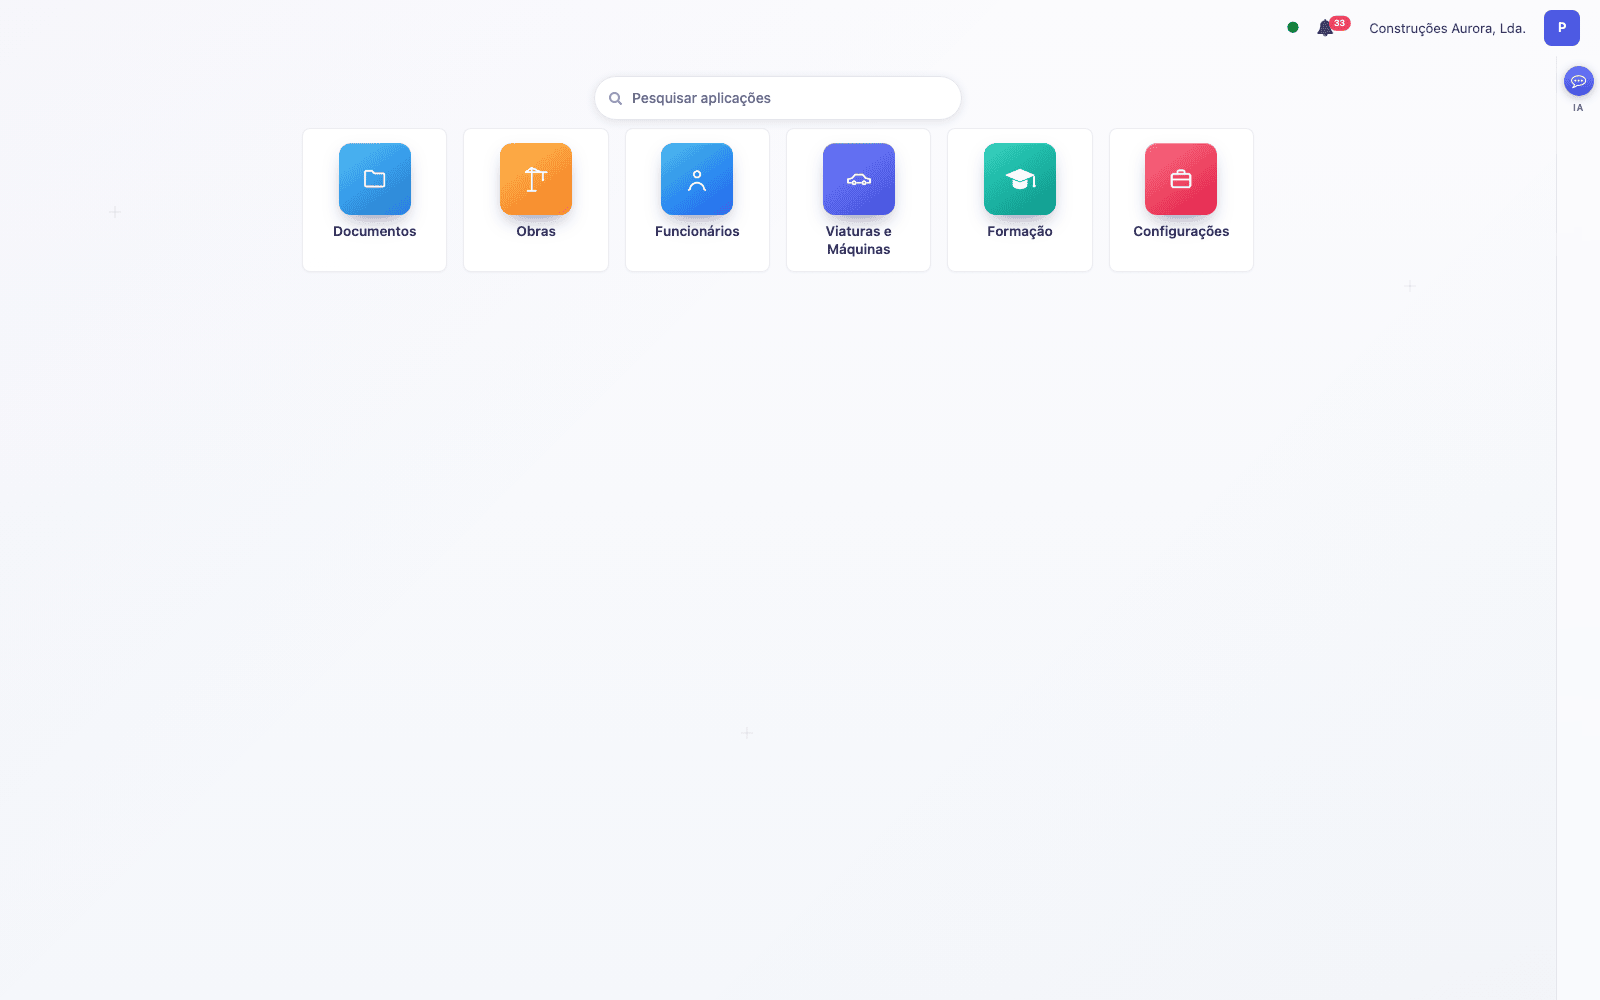
After signing in you see the home menu: a grid of apps, like a phone screen. Each tile opens an app. What appears depends on the profile — a site worker sees what they need day to day; the office sees the management side.
The profiles
| Profile | Who it is | What they do on the platform |
|---|---|---|
| Site Worker | Bricklayers, labourers, electricians, plant operators… | Clocks in, requests holidays and materials, submits expenses and sees their training |
| Foreman | Leads the team in the field | The same as the employee, plus the site diary and approval of the team's absences |
| Site Manager | Site director or site manager | Manages sites, approves attendance recorded offline, deadlines and safety |
| Administrative / Office | Administrative support | Looks up contacts, documents and the calendar, and handles the deadlines typed by hand (insurance, inspections, contractor's licence) |
| Human Resources | Looks after the people | Records, contracts, absences, requests, expenses, documents and training |
| Company Manager | Management | Everything the others do, plus users, subscription and AI credits |
Getting around the app
- Search for an app — with the menu open, start typing: the grid filters as you type, Enter opens the first result, Esc clears it.
- Back — inside an app, the arrow in the top left-hand corner goes back one level; the app name next to it takes you to its menu.
- Side menu — in apps with several menus (Sites, Employees, Training) the menu sits on the left and can be collapsed.
- Top bar — the green or red dot is the time clock (green = clocked in); the speech bubble shows messages and notifications; the “AI” tab on the right-hand edge opens the assistant.
- Views — many lists have buttons in the right-hand corner to switch between board, list, calendar or chart.
The four things an employee does on the platform: clock in, make requests (holidays, materials, documents), submit expenses and keep their profile up to date.
3 Clock-in, holidays and absences
Clocking in
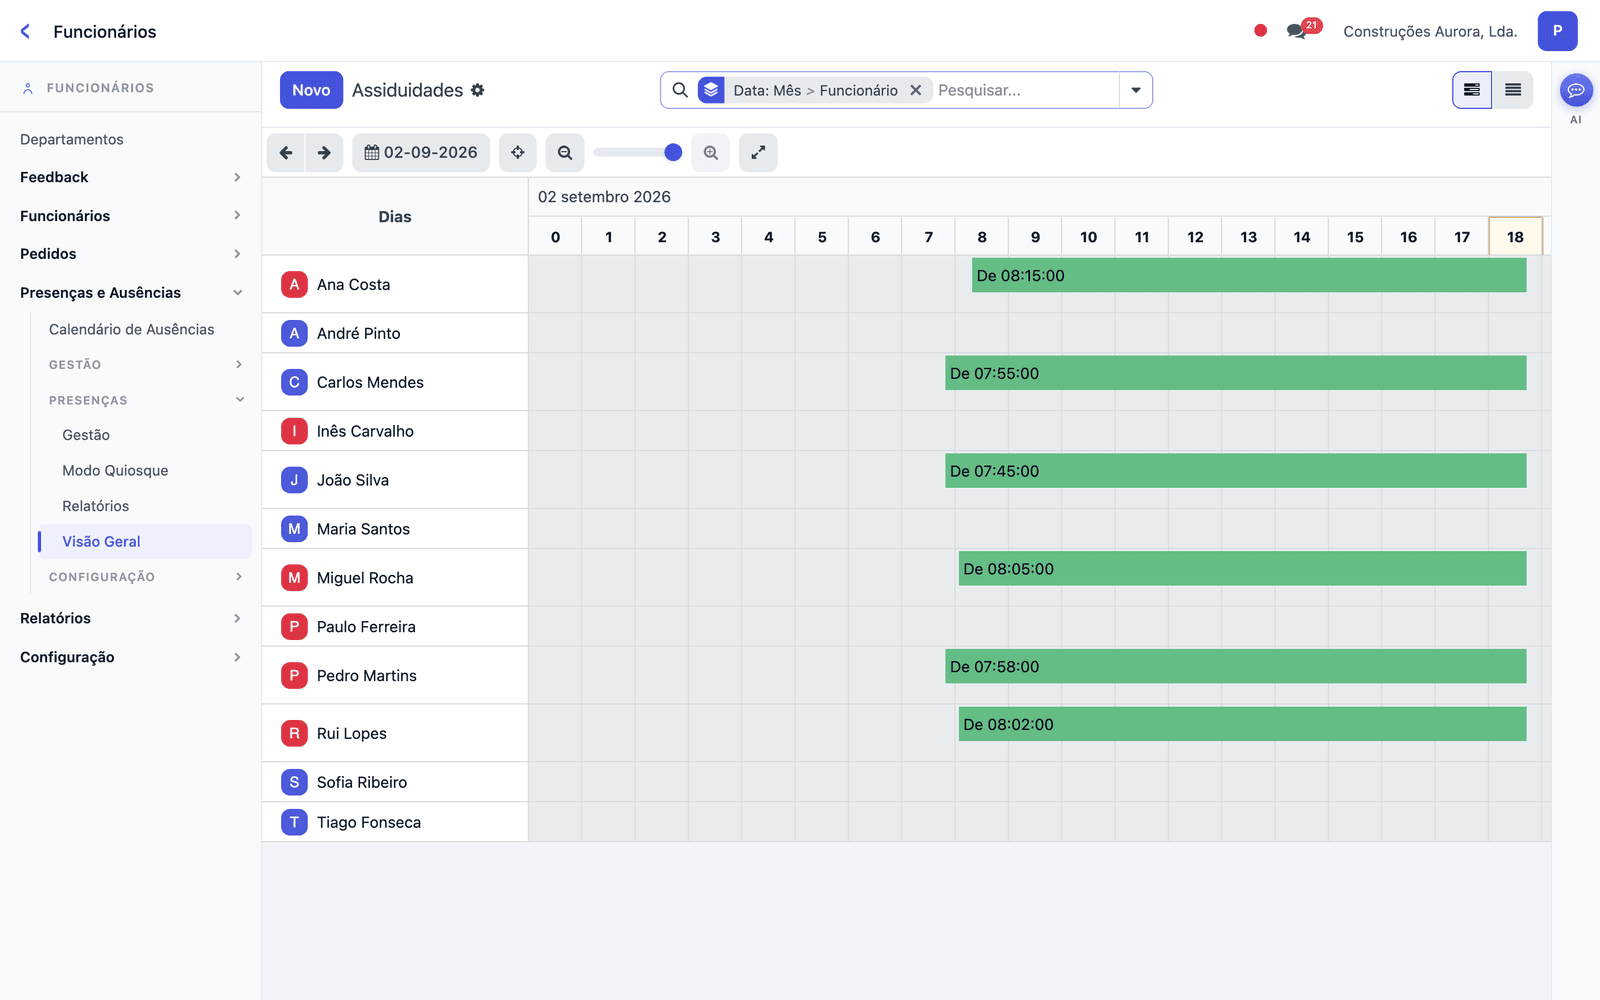
- In the mobile app — tap “Clock in” when you arrive at the site and “Clock out” when you leave. The clock-in saves the time, the location and the site.
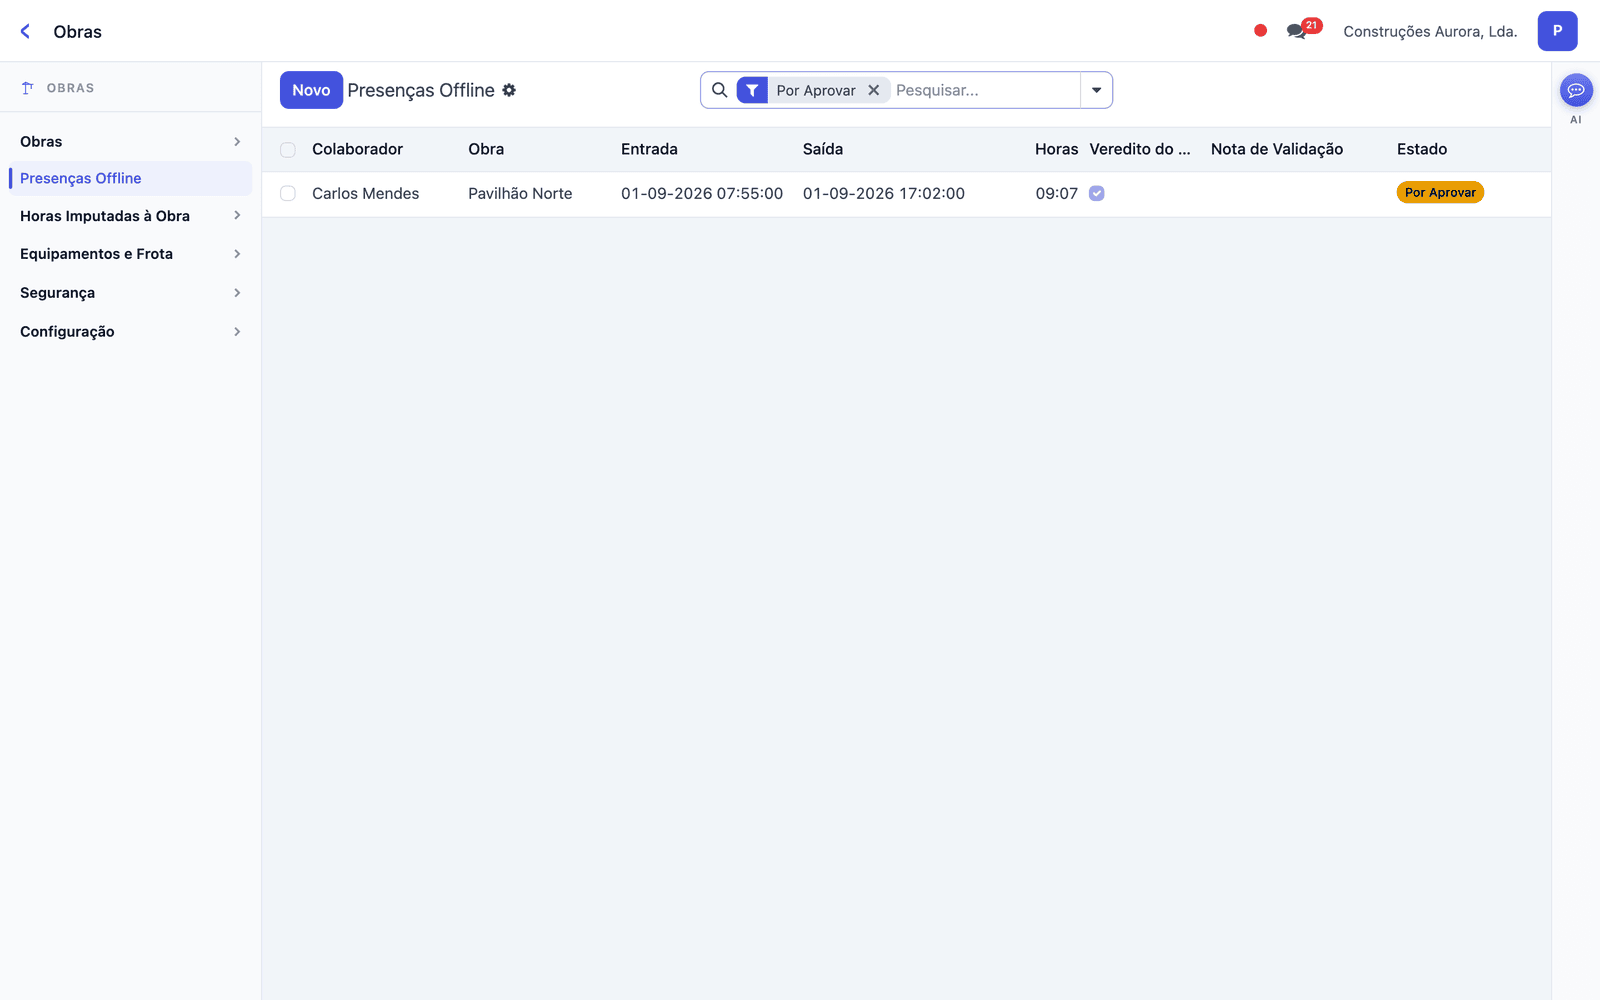
- No signal — the clock-in is saved on the phone and sent when the connection returns. It comes in as offline attendance and only counts once the Site Manager approves it.
- On the computer — the clock in the top bar clocks you in and out without leaving what you are doing.
- Fixed device on site — the company can leave a tablet at each site (Sites → Configuration → Clock-in Devices).
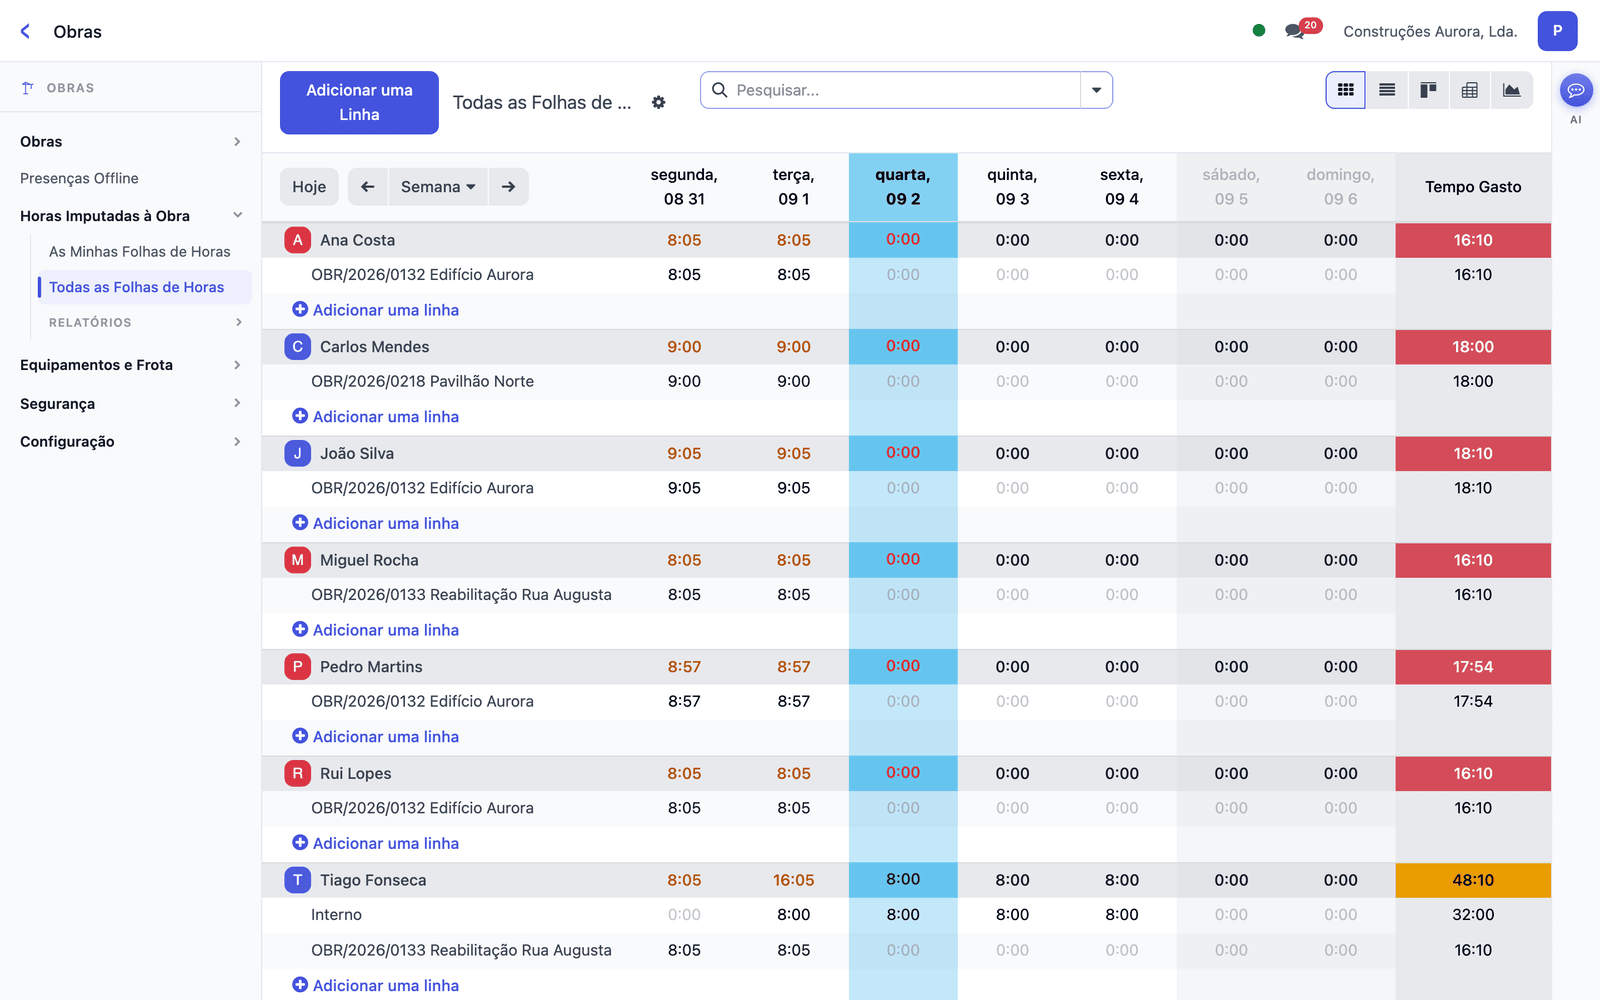
Each clock-in is linked to the site where the employee is, and the hours then appear in Sites → Hours Charged to Site (see section 8).
Requesting holidays or justifying an absence
- Open My Requests and click “New”.
- Choose the Holidays or Absences and Leave category, enter the period and, if you wish, a note or supporting document (a sick note, for example).
- Click “Send Request”. The request reaches the HR team in Request Management.
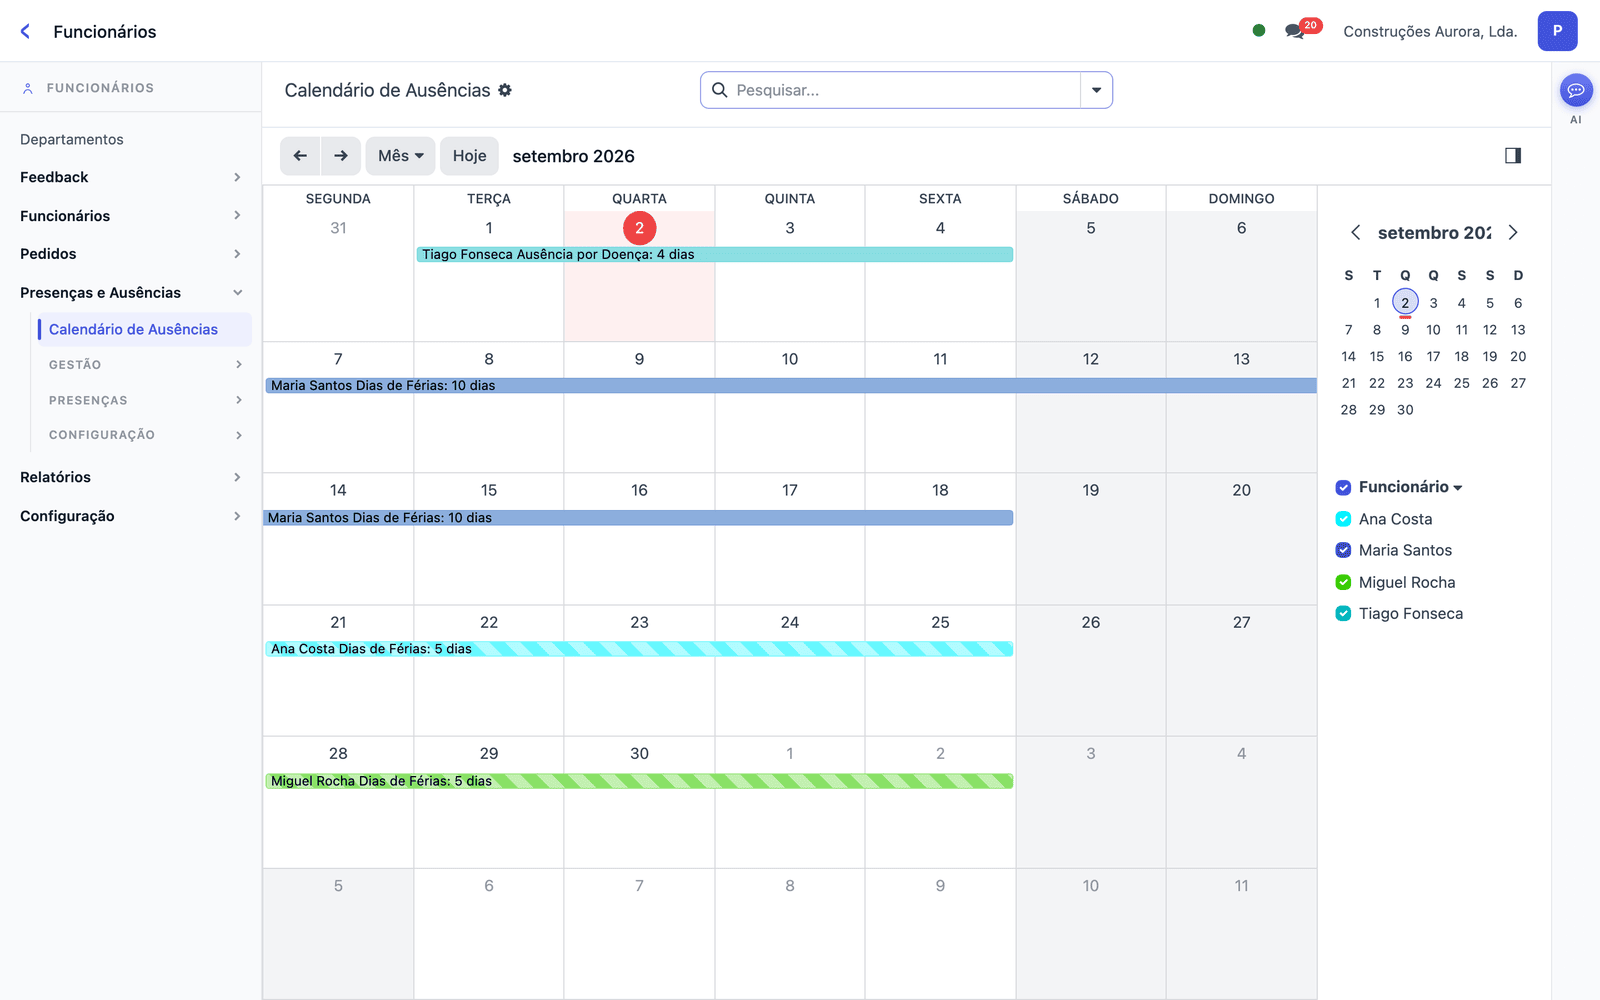
- You receive a notification with the decision. If approved, the absence goes straight into the absence calendar.
4 My Requests — the one-stop shop
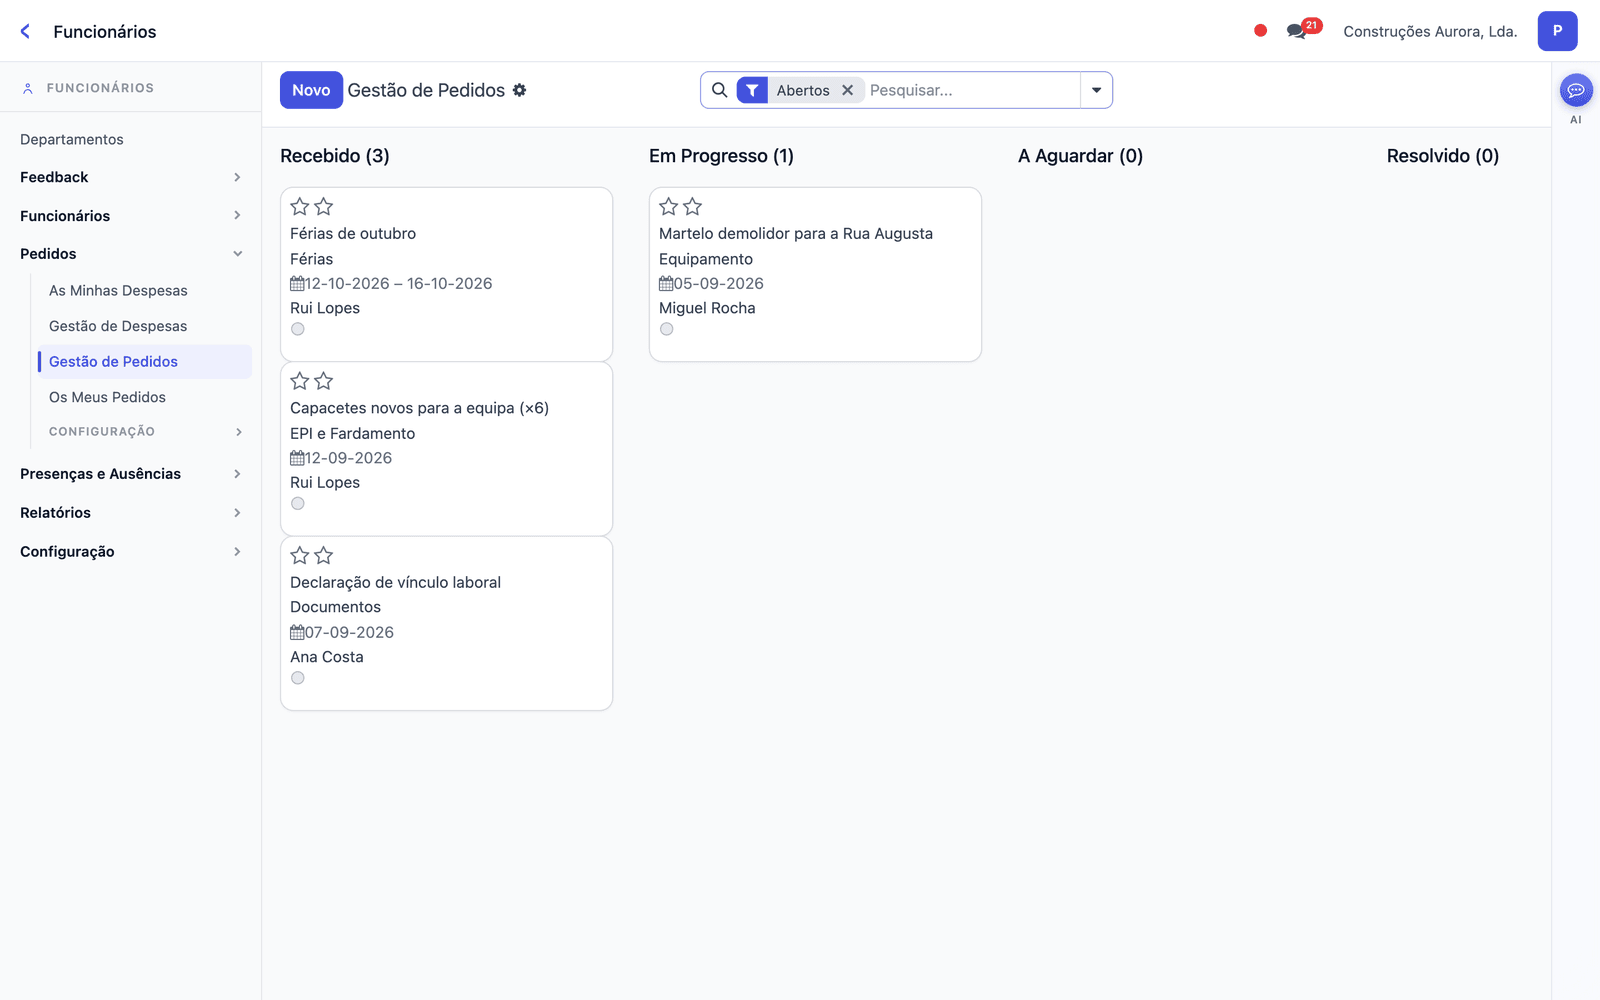
Need a certificate, new hard hats, a machine for next week, or to report a breakdown? Everything that depends on the office goes through My Requests. No lost emails or paperwork: each request has a status and notifies you when it changes.
Opening a request
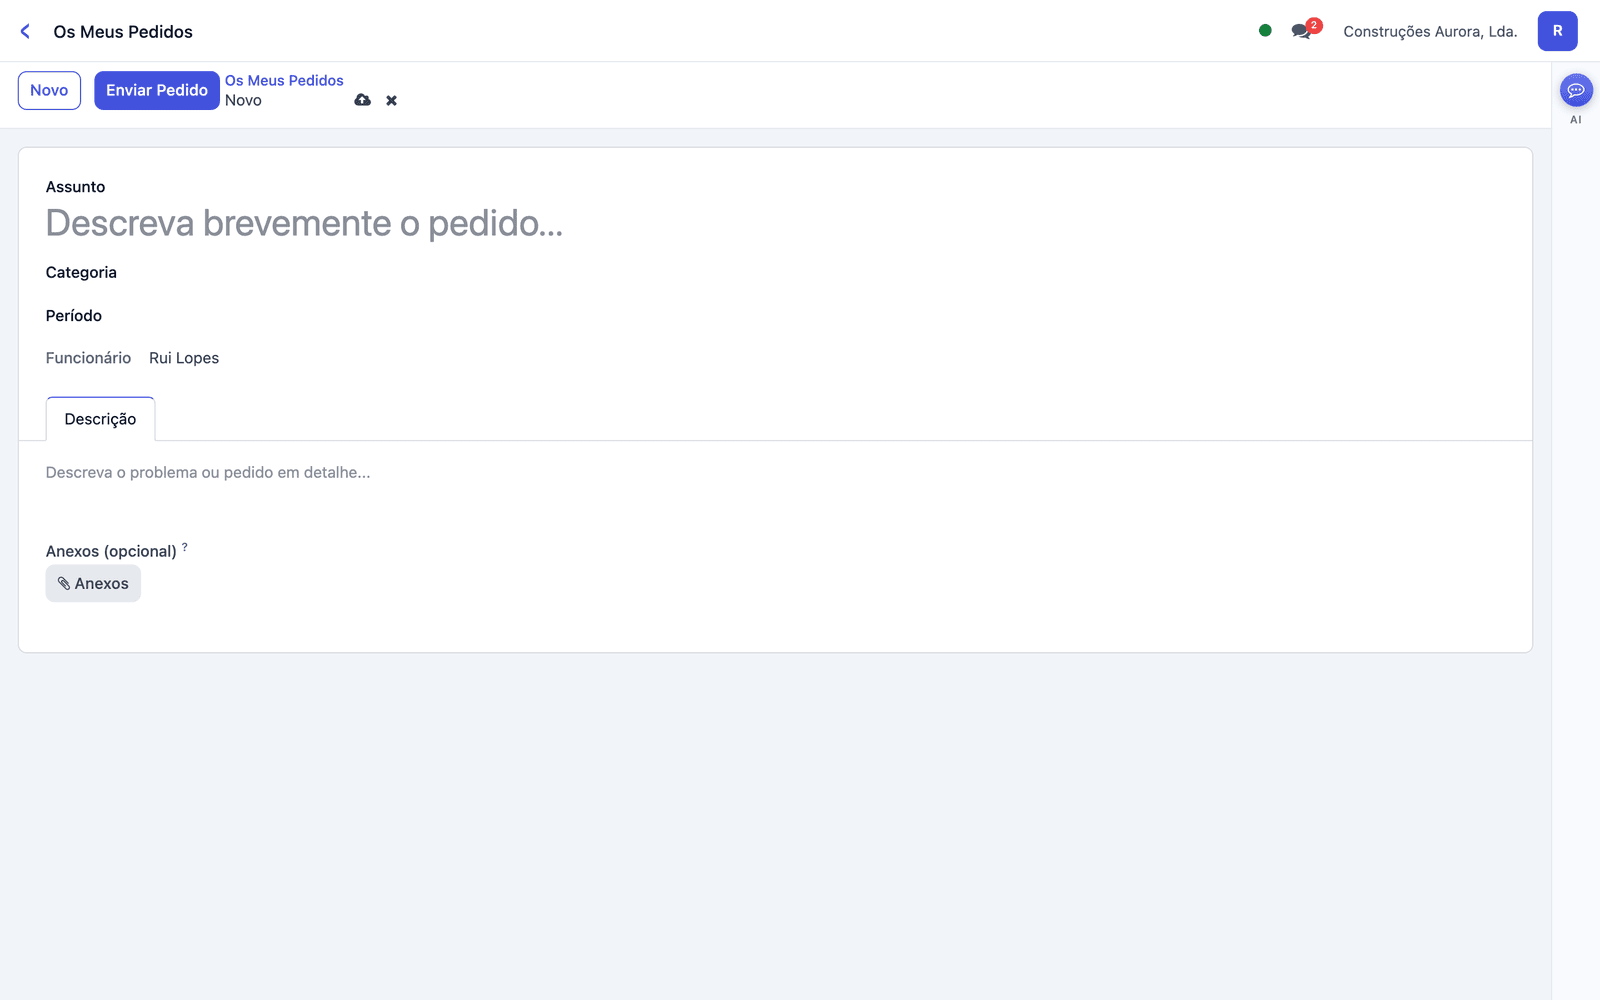
- In My Requests, click “New”.
- Enter the subject, choose the category (Holidays, Absences and Leave, PPE and Workwear, Documents, Equipment, Other) and the required date.
- Describe what you need, attach photographs if it helps, and click “Send Request”.
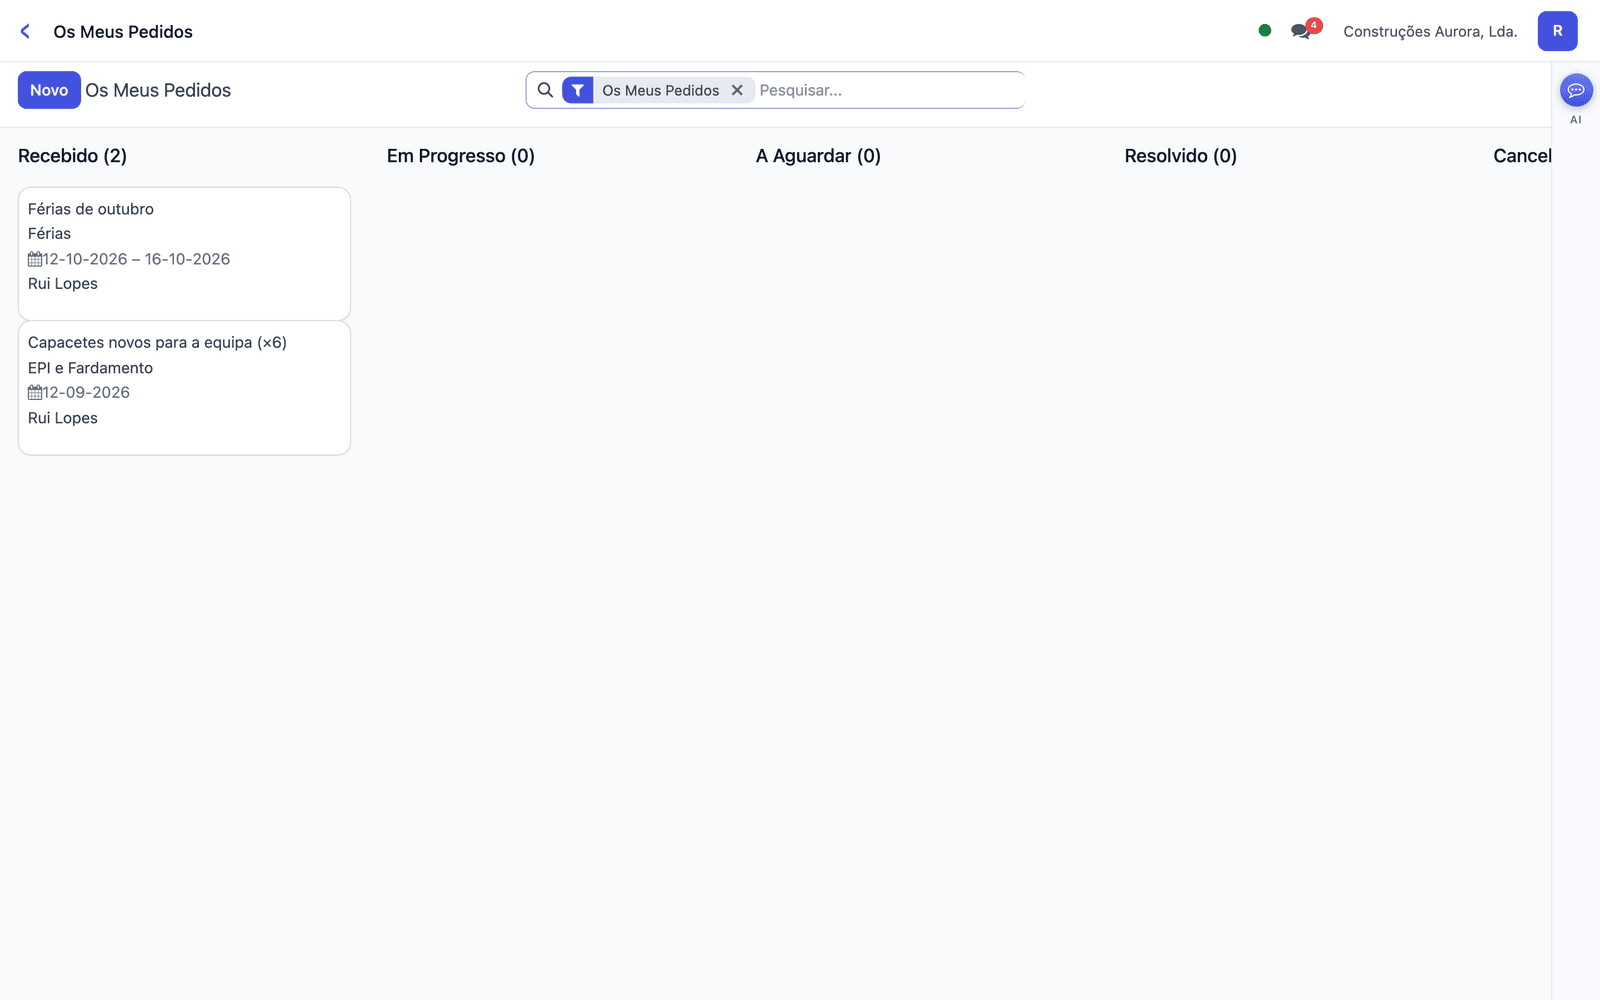
- Track the status on the board: Received → In Progress → Waiting → Resolved. If you no longer need it, use “Request Cancellation”.
On the side of those who handle it (HR)
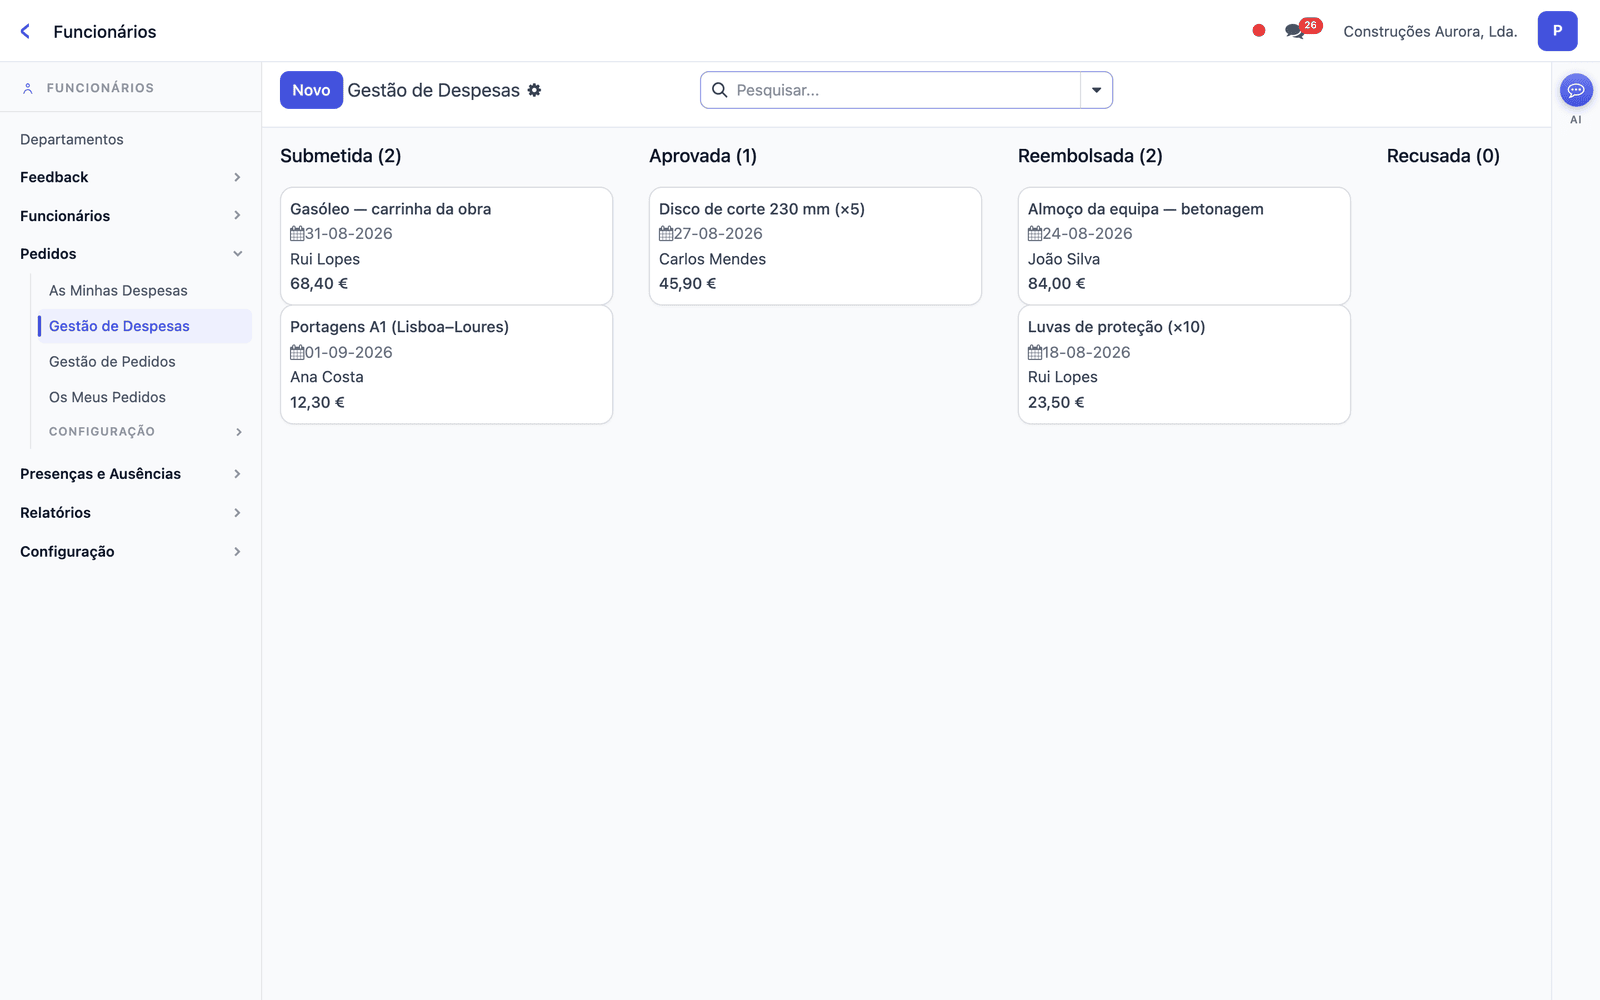
Requests from the whole company appear in Employees → Requests → Request Management. The manager drags the card between columns, replies on the request and decides with “Approve” or “Reject”; the employee is notified. In the Holidays and Absences categories, approving creates the absence in the calendar straight away.
5 Expenses
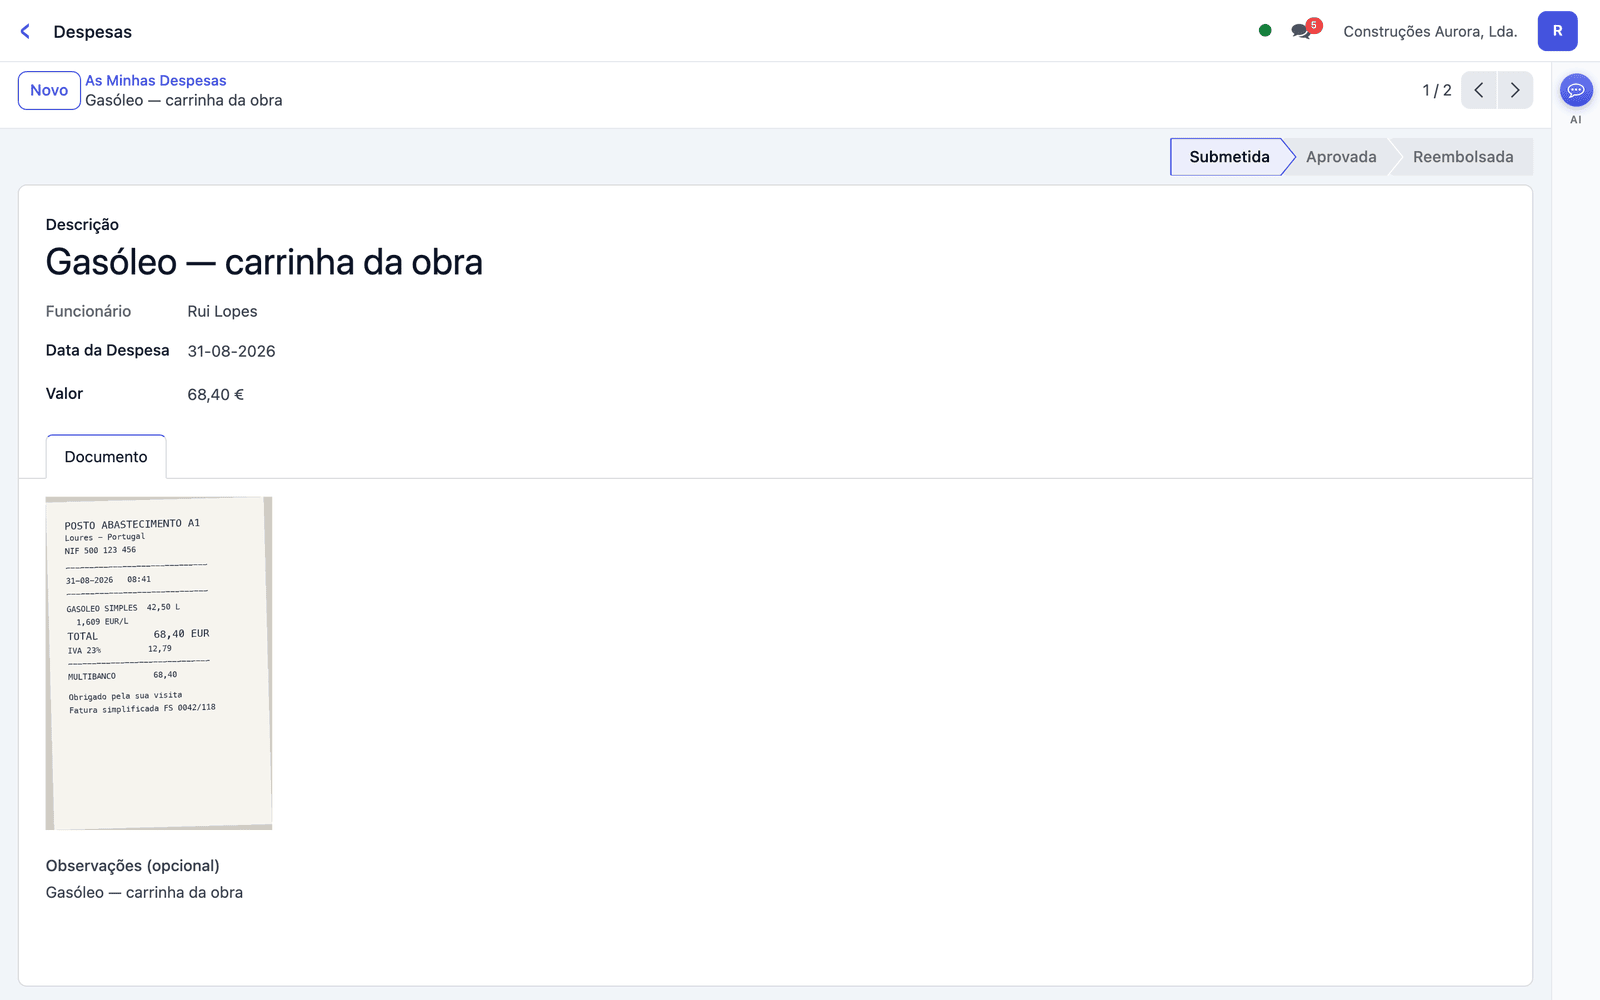
Diesel, tolls, a tool bought in a hurry: the employee submits the expense with a photo of the receipt and tracks the reimbursement.
Submitting an expense
- Open Expenses (on your mobile or computer) and click “New”.
- Enter the description, confirm the date and amount, and photograph or attach the receipt in the Document tab.
- Click “Submit Expense”. HR is notified.
- Track the status: Submitted → Approved → Reimbursed (or Rejected, with the reason).
Validated IBAN
Reimbursement is paid to the IBAN on the employee's record. Anyone who changes the IBAN in My Profile leaves it pending until HR validates it — the record shows the new IBAN and the supporting document side by side until it is confirmed.
6 My Profile and your account
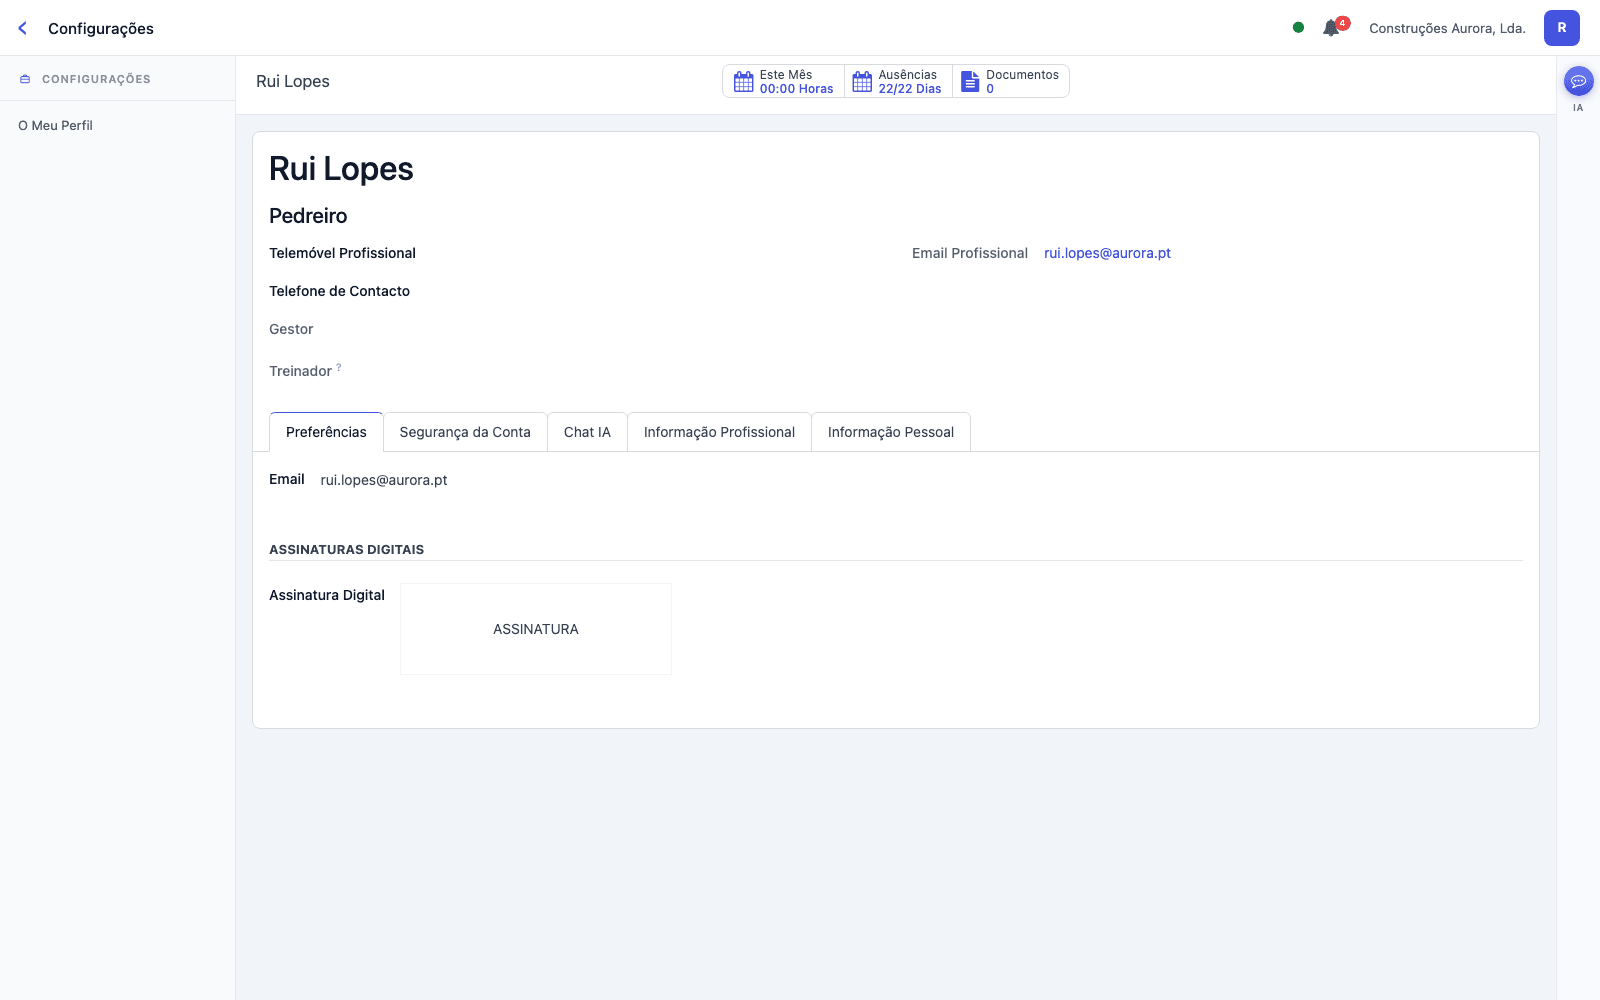
My Profile, in the Settings app, is your record: who you are, how to contact you and your documents. The buttons at the top lead to this month's hours, absences and documents.
- Personal details — you can update your address, mobile number and emergency contact yourself (Personal Information). The rest of the record (job title, contract, site) is managed by HR.
- IBAN — you can change it, but it stays pending until HR confirms it (see section 5).
- Change password — in the Account Security tab; enter the current one and the new one.
- Signature — draw your signature once in Preferences; it is used on the internal documents you are asked to sign.
- Notifications — they arrive in the speech bubble on the top bar and by email (and in the app, on your mobile). Clicking a notification opens the record and marks it as seen.
The apps for those who manage: people, sites and hours, deadlines, safety, training, documents and the company account.
7 Employees
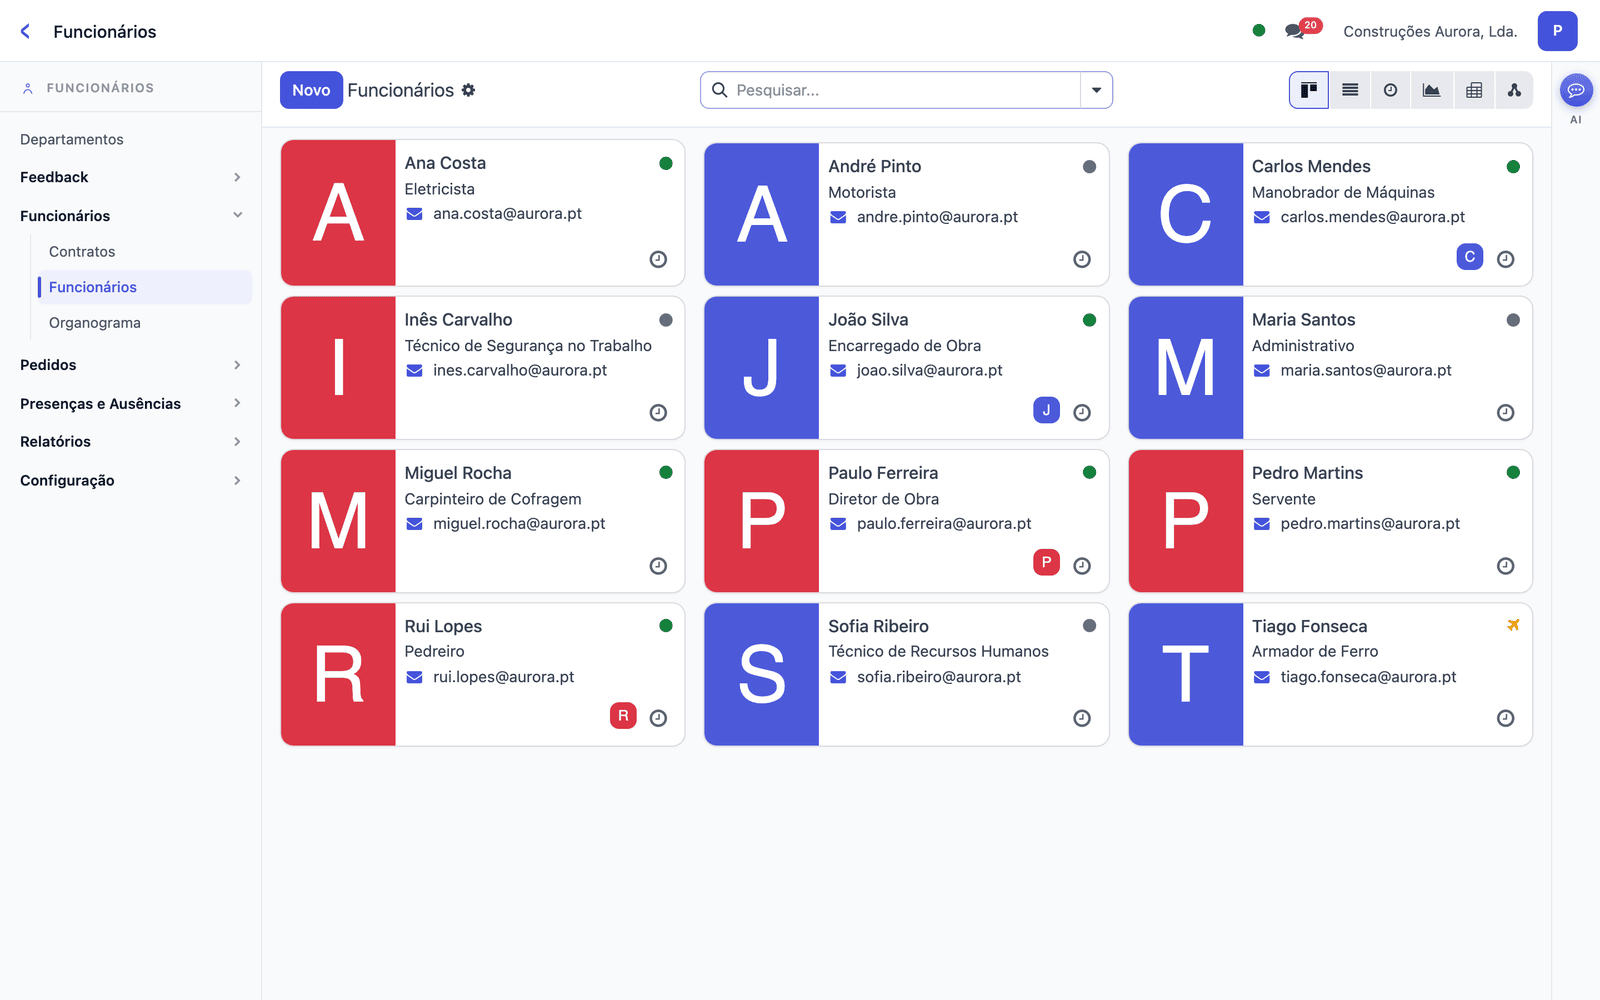
The Employees app keeps each employee's record and brings together, in the side menu, everything HR handles: requests, expenses, attendance and absences, feedback and reports. It does not process payroll — that stays with your accountant.
| Menu | What for |
|---|---|
| Employees | The record: personal details, emergency contact, job title, department, current site, skills and certifications. The avatar with the initials is generated automatically. |
| Employees → Contracts | Contract type, start and end dates and renewal alerts — without payroll processing. |
| Departments and Organisation Chart | Construction departments ready to use (Production/Sites, Engineering, Safety…) and the tree of who reports to whom. |
| Requests | Request Management and Expense Management (sections 4 and 5). |
| Attendance and Absences | Absence calendar, approval of absences and allocations, today's attendance and reports (section 3). |
| Feedback | Annual feedback cycle between the manager and each employee. |
| Reports | Absences by employee and by type, holiday balance, skills. |
Creating an employee
In Employees → Employees click “New”, fill in the name, job title and department and save. To give them access to the platform, create the user in Settings → New User (section 14) — the record and the user are linked by email.
8 Sites and hours per site
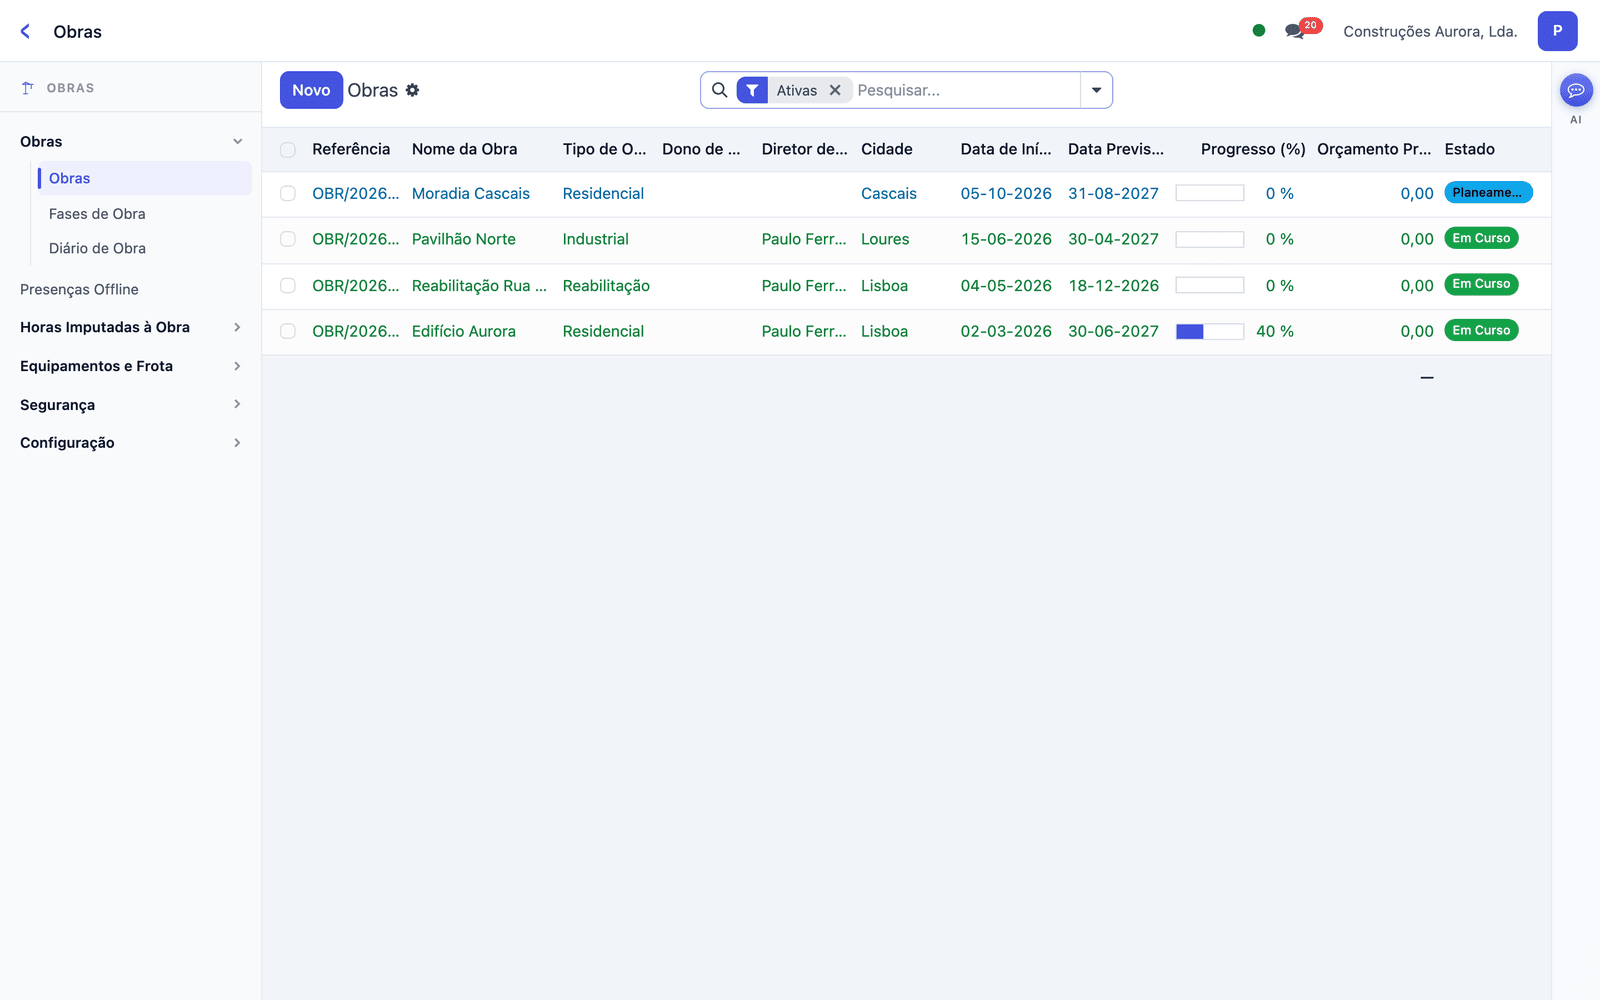
The Sites app exists so that clock-ins, hours and safety are always linked to a site. Each site has its team, its phases and its log.
Creating a site
- In Sites → Sites click “New”.
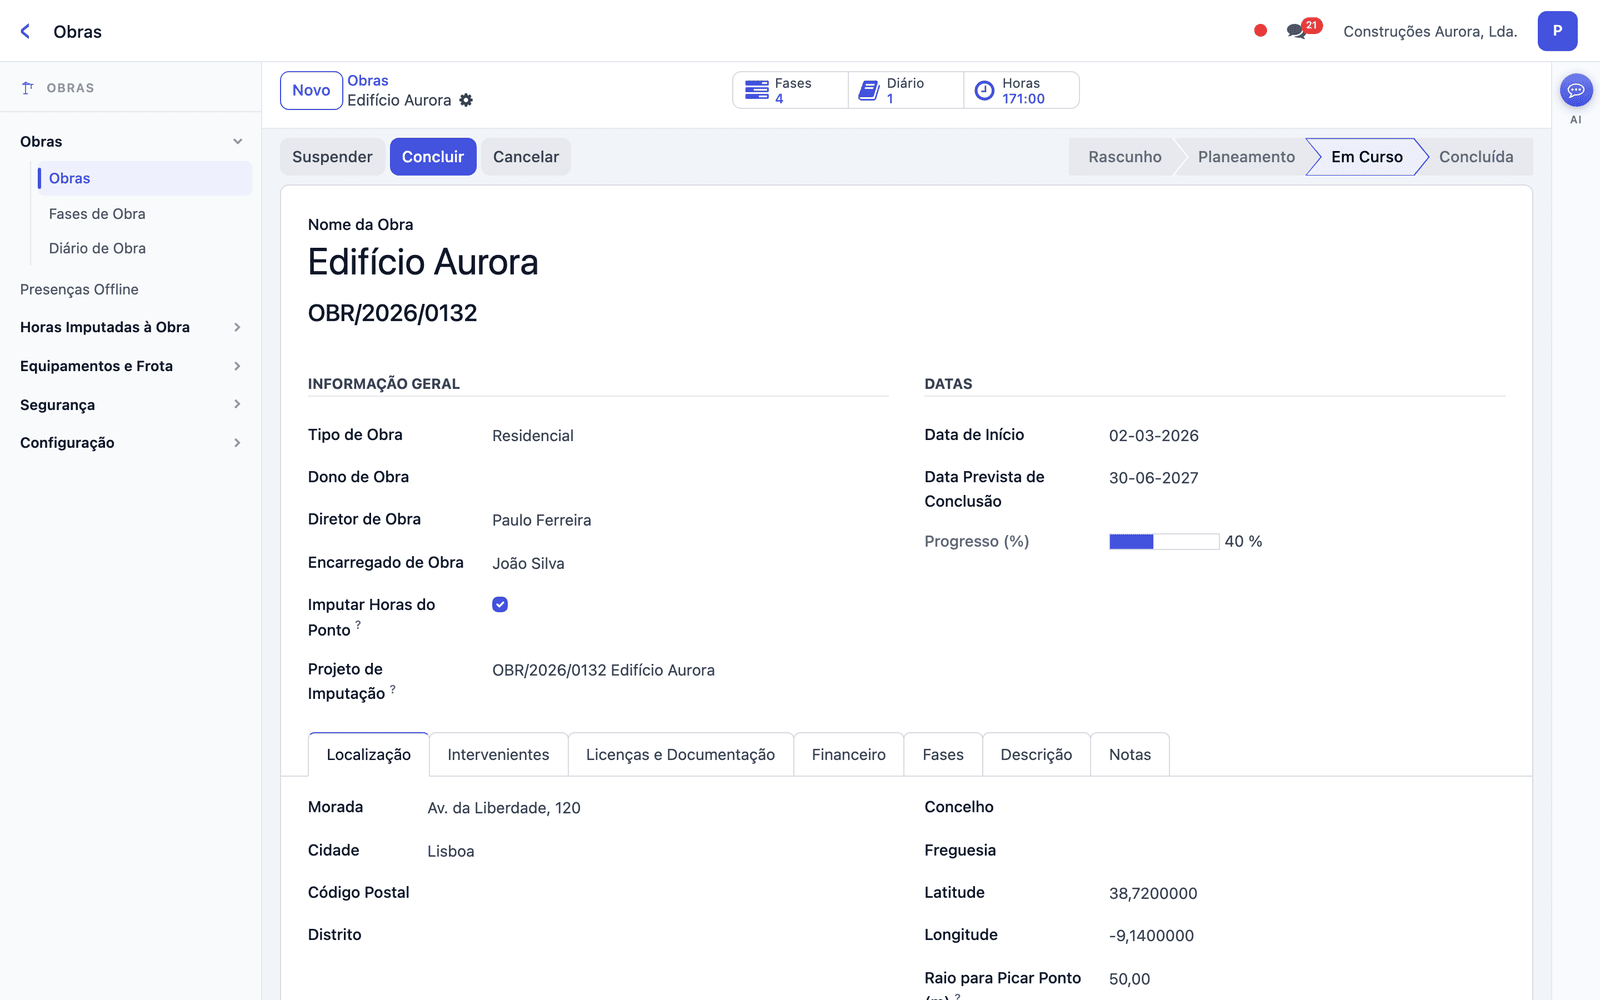
- Fill in the name, type, address, planned dates, site director and foreman.
- Leave “Charge Clock-in Hours” switched on so that employees' clock-ins count towards this site, and set the clock-in radius around the site compound.
- Save and move the status forward with the buttons at the top: Draft → Planning → In Progress → Completed.
Tracking the site
- Site Phases — each site is divided into phases (foundations, structure, finishes…) with dates, a manager and progress; the site's progress comes from the phases.
- Site Log — the foreman records the day: work done, time, how many were present, incidents and equipment used.
- Hours Charged to Site — timesheets are generated automatically from the clock-in, employee by employee and site by site. No more paper timesheets.
- Team — each employee's current site is on their record; changing the site changes where the following hours go.
9 Forecasts and quotes
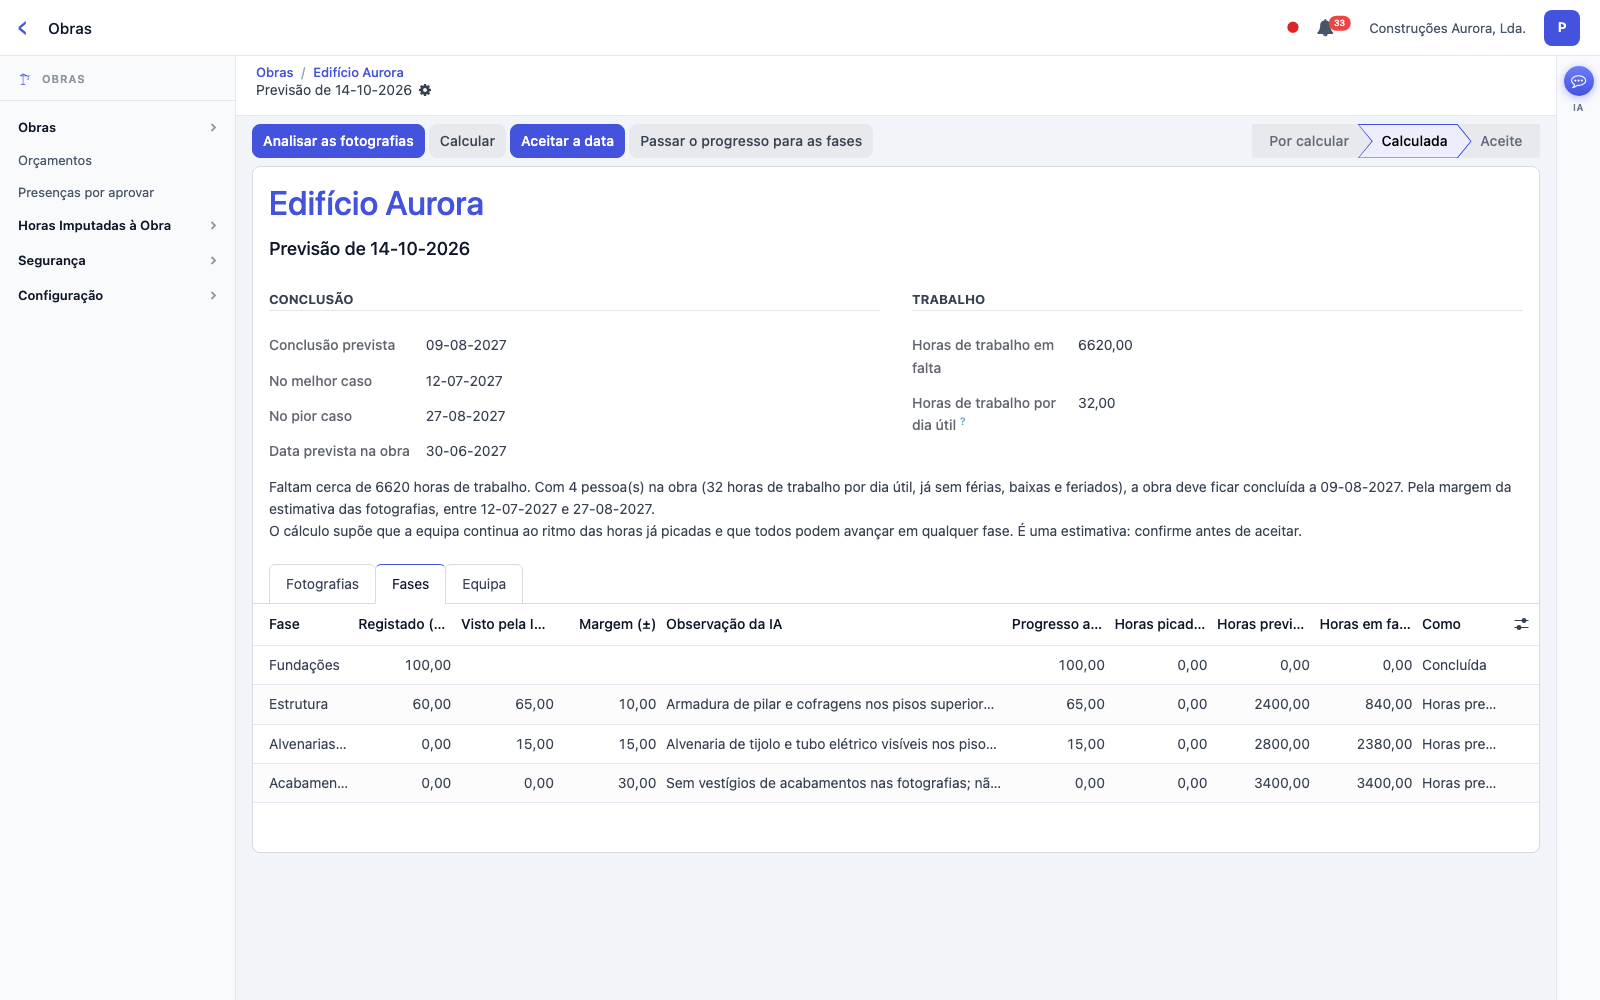
Forecasting completion
- On the site, click “Forecast completion”.
- Add photos and write down what they don't show.
- Click “Analyse the photos”. The AI estimates each phase and you can correct the values; if no hours have been clocked yet, enter the planned hours.
- See the date, the best case and the worst case. Add or remove people to see the effect on the date.
- “Accept the date” copies it to the site and to Deadlines.
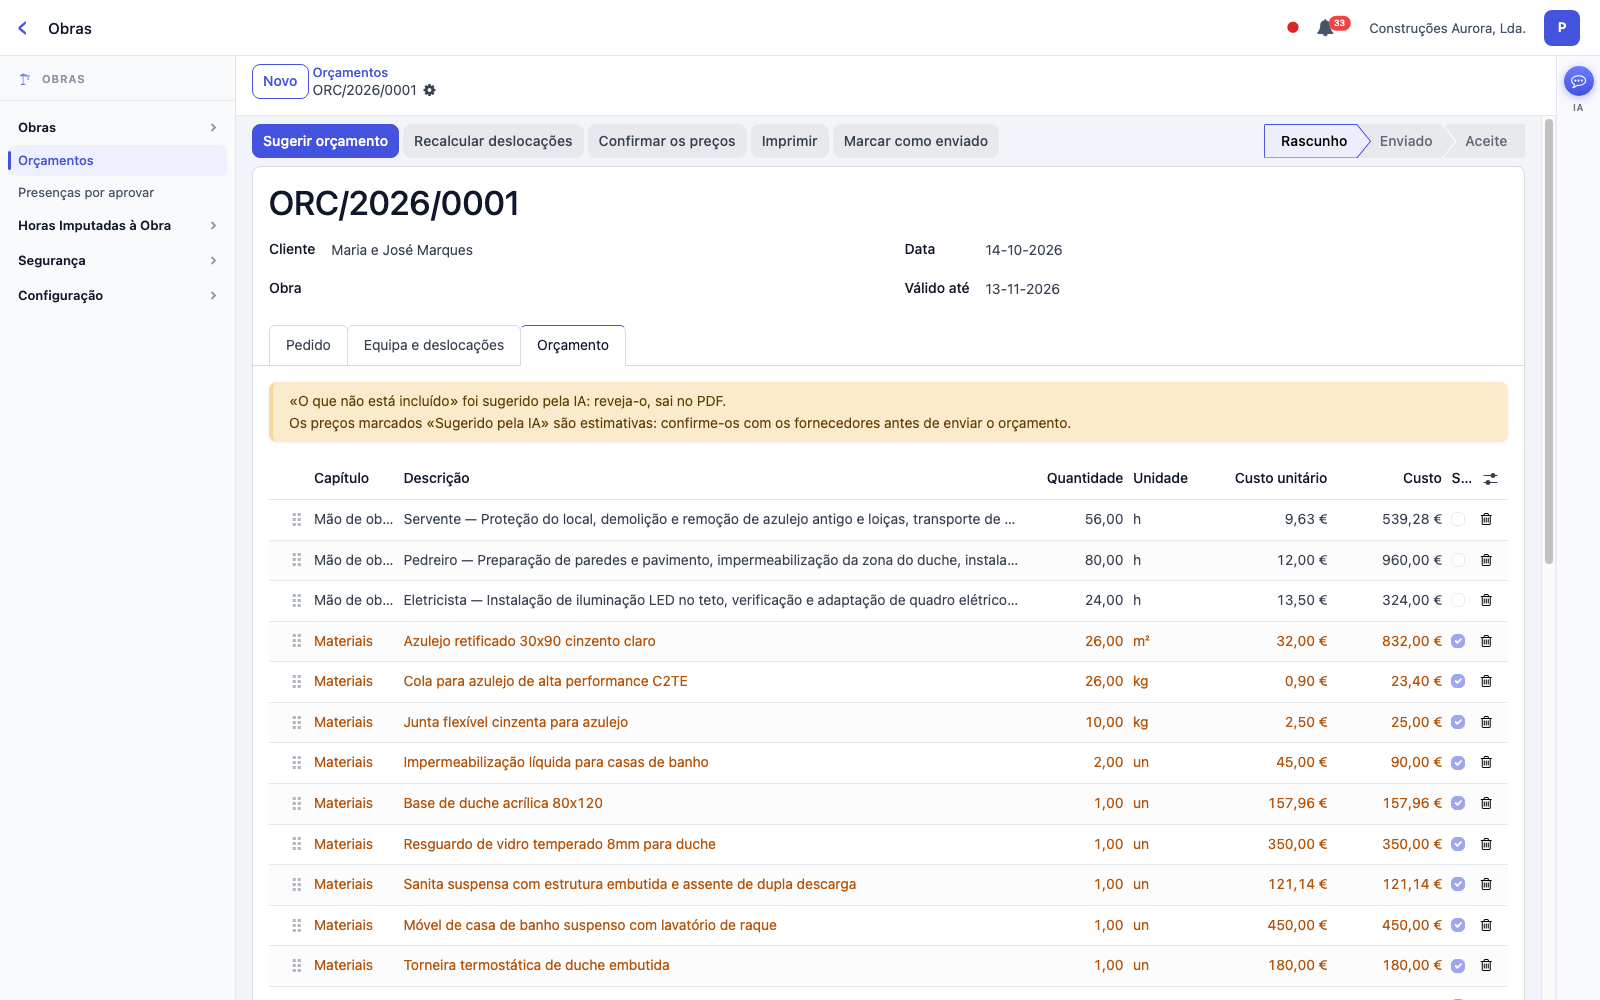
Making a quote
- In Sites → Quotes → New, describe the work and answer the questions. Whatever you don't know, the AI assesses.
- Click “Suggest quote”.
- Confirm the prices marked “Suggested by the AI”.
- “Print” creates the PDF. “Accepted by the client” copies the amount to the site.
Through Recato
“When will site X be finished?”, with photos, or “make me a quote for…”.
10 Deadlines
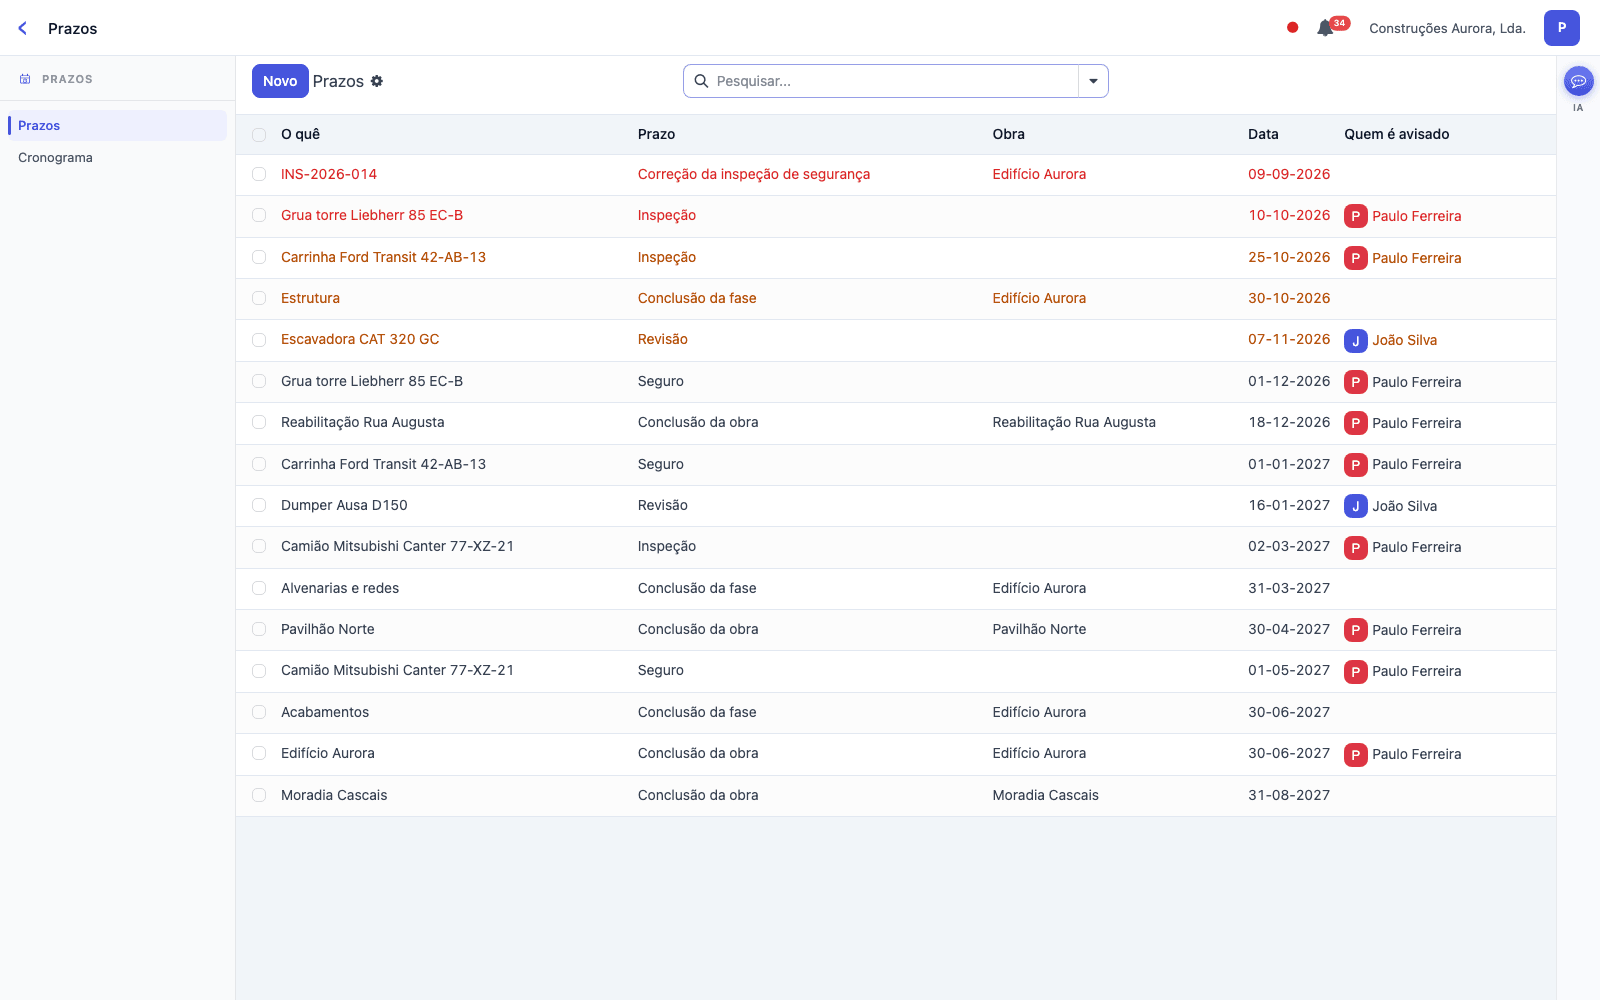
The Deadlines app gathers in one list every date that must not slip by, with a reminder before it expires.
What appears on its own
- The planned completion of the site and of each phase.
- The expiry of the site's building permit.
- The correction deadline of a safety inspection that requires action.
- The review date of an approved or active safety plan.
When the site is completed or cancelled, its deadlines leave the list.
Add a deadline
- Click “New” and type what it is (a vehicle, a machine, the contractor's licence). The second time it is already there to pick.
- Type or choose the deadline (Inspection, Insurance, Service or another), the date and who gets the reminder.
- The list shows what expires first at the top: in orange what expires in the next 30 days, in red what is already overdue.
- The person to be reminded gets a notification 30 days before and another 7 days before. After the inspection or the renewal, change the date to the next one: the reminders start again on their own.
Click a row to open the site, the phase, the inspection or the plan. That is where you change the date or mark it as done.
Timeline
In Deadlines → Timeline, in Sites → Sites → Timeline or with the “Timeline” button inside each site, you see each site's phases over time. The bar fills up with the progress and turns red when the phase is past its date without being completed. It is view-only: dates are changed inside the phase.
Each person sees the sites they already see in the Sites app. Administrative / Office sees the deadlines typed by hand.
11 Site safety
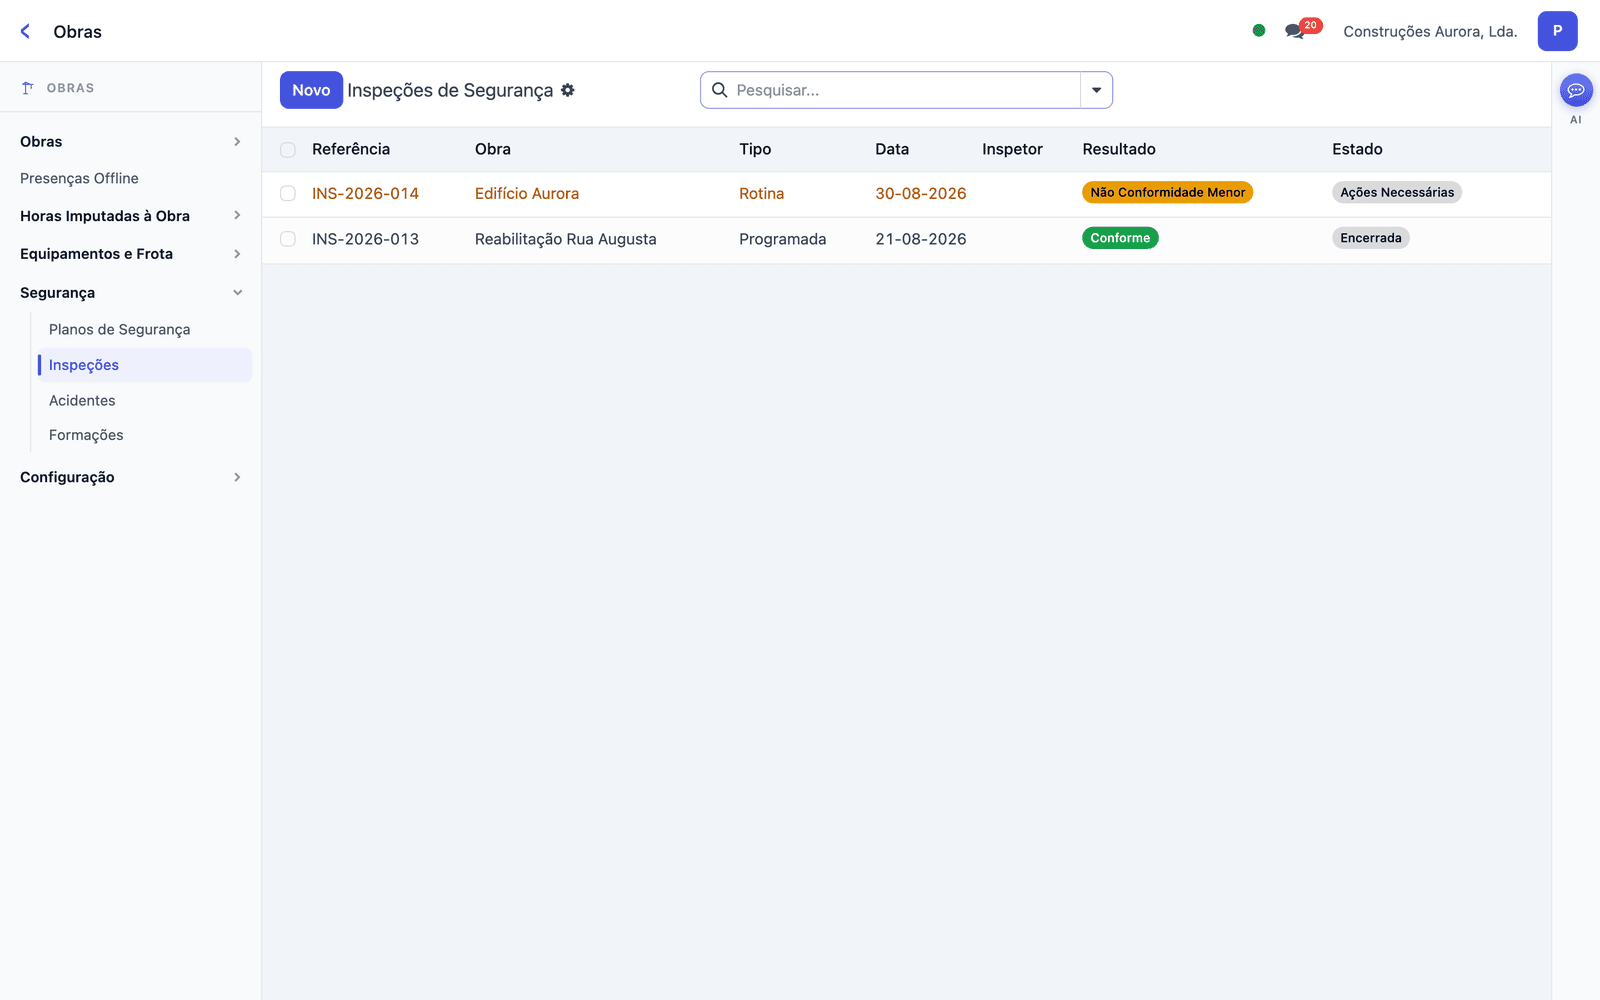
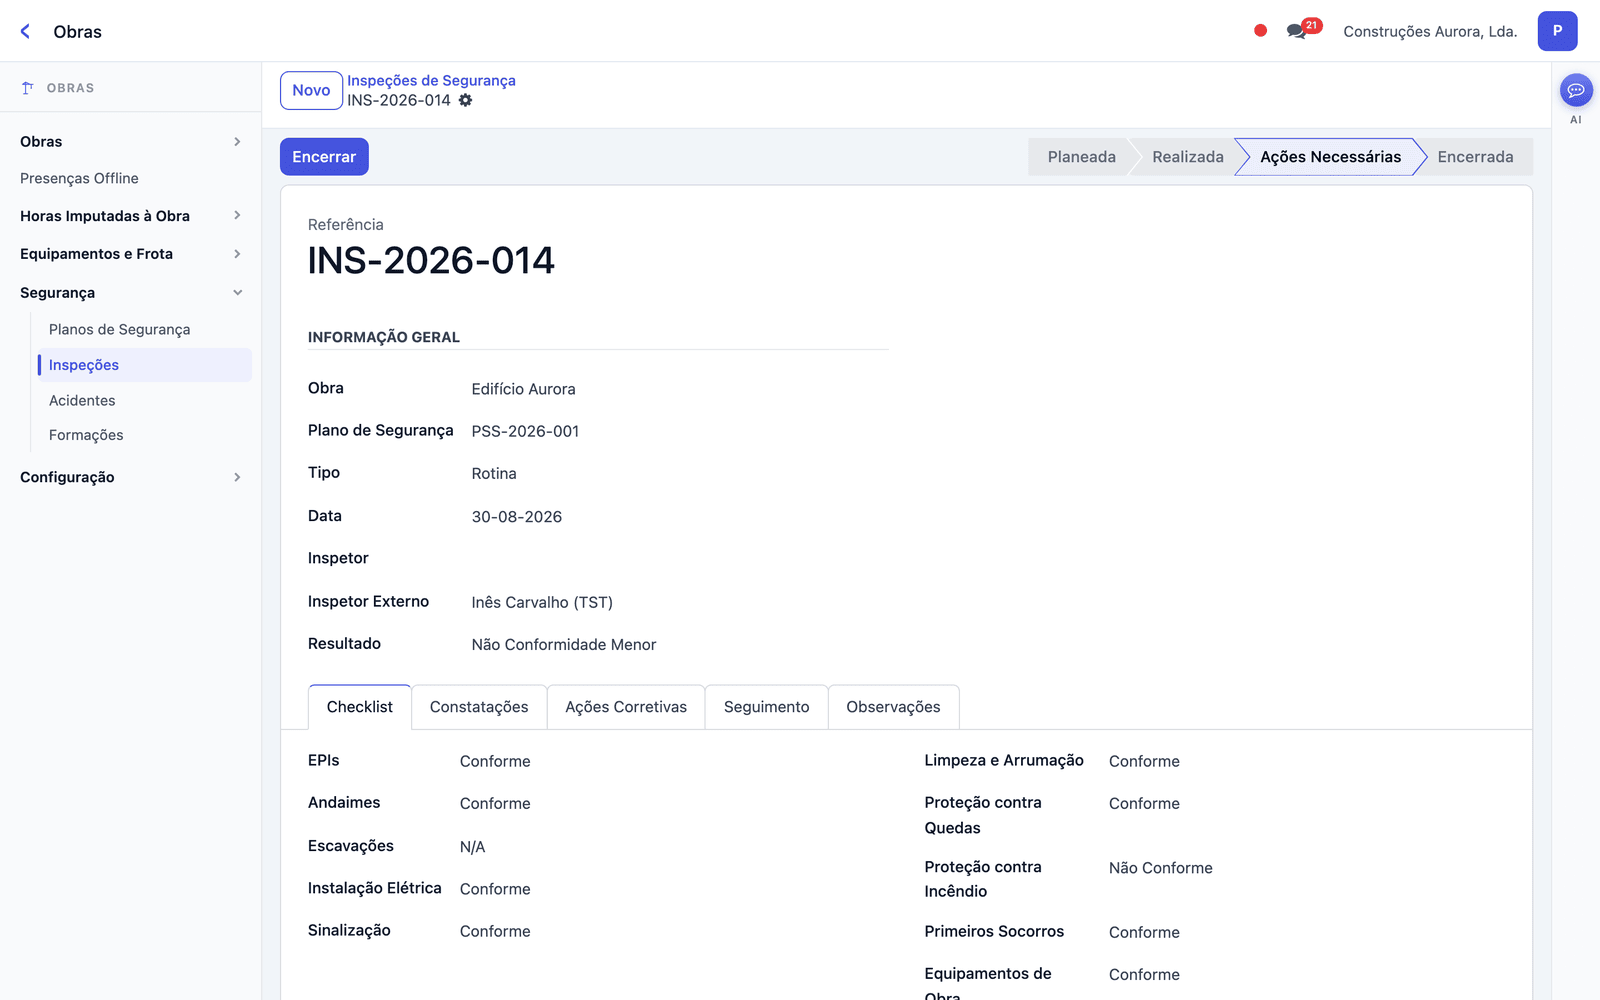
In Sites → Safety you record safety plans, inspections, accidents and safety training, always linked to a site.
Health and Safety Plan (PSS)
Design-stage or construction-stage health and safety plan (PSS), procedure sheets and emergency plans, with versions and status
Inspections
Checklist (PPE, scaffolding, falls, fire…), result and corrective actions with deadlines
Accidents
What happened, to whom, the causes, the reports to the labour authority (ACT) and to the insurer
Training
Induction, toolbox talks, working at height, drills — with participants and duration
12 Training
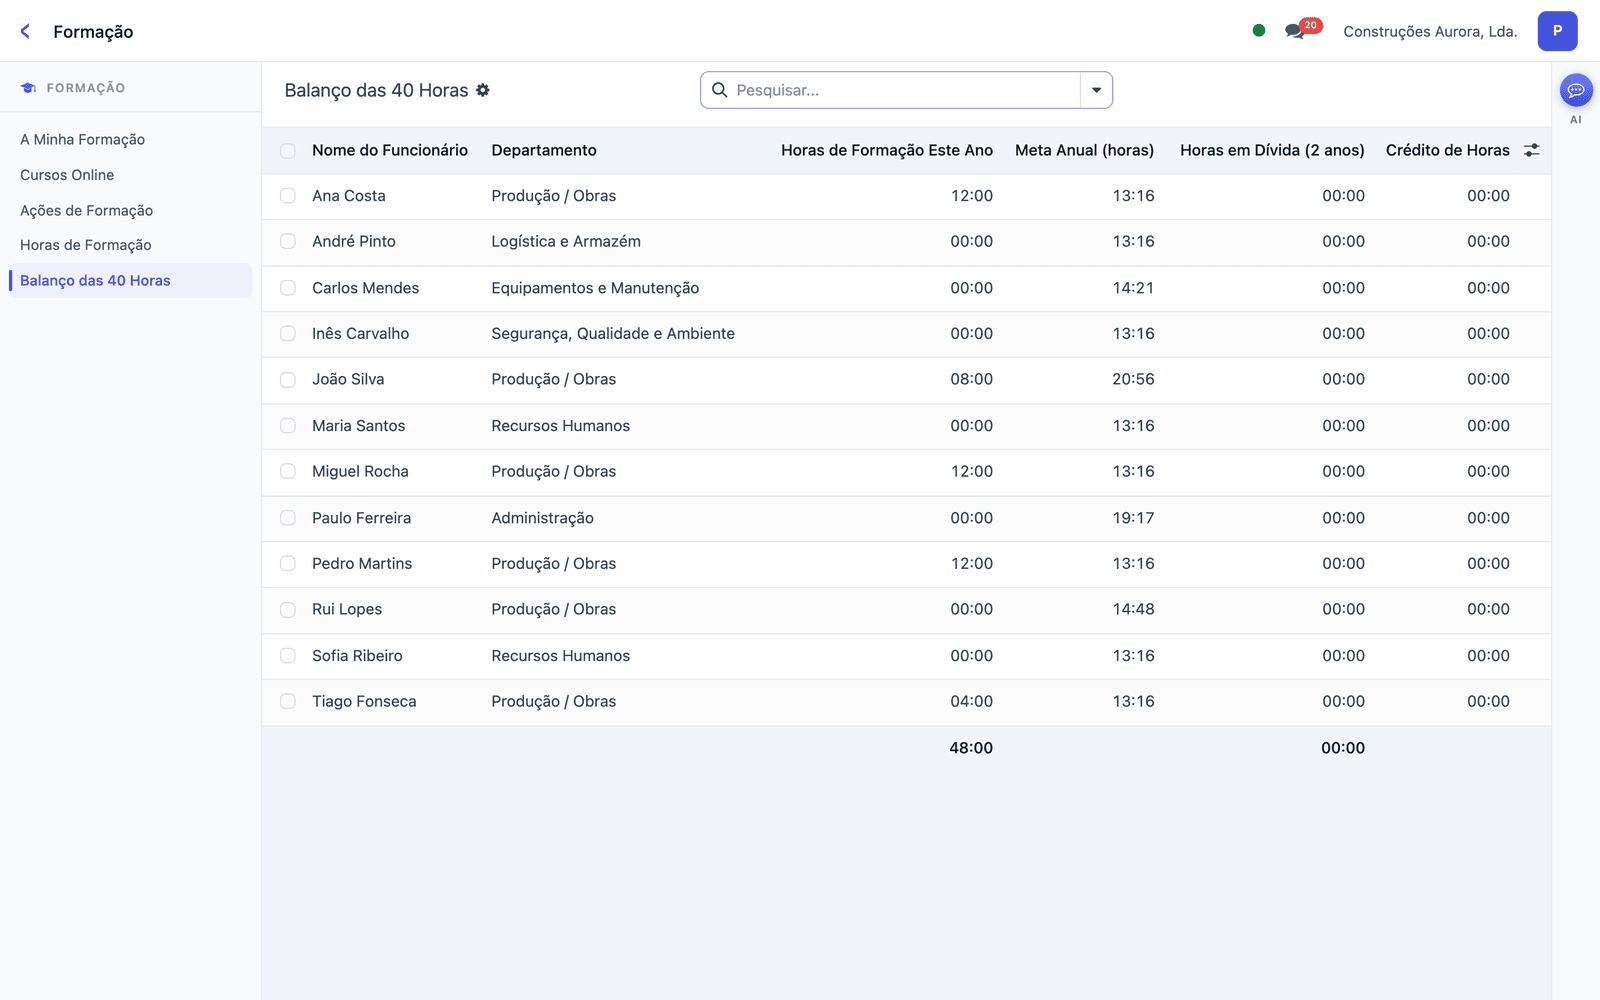
Schedule training sessions, publish online courses and track each employee's hours — including the mandatory 40 hours a year.
| Menu | What for |
|---|---|
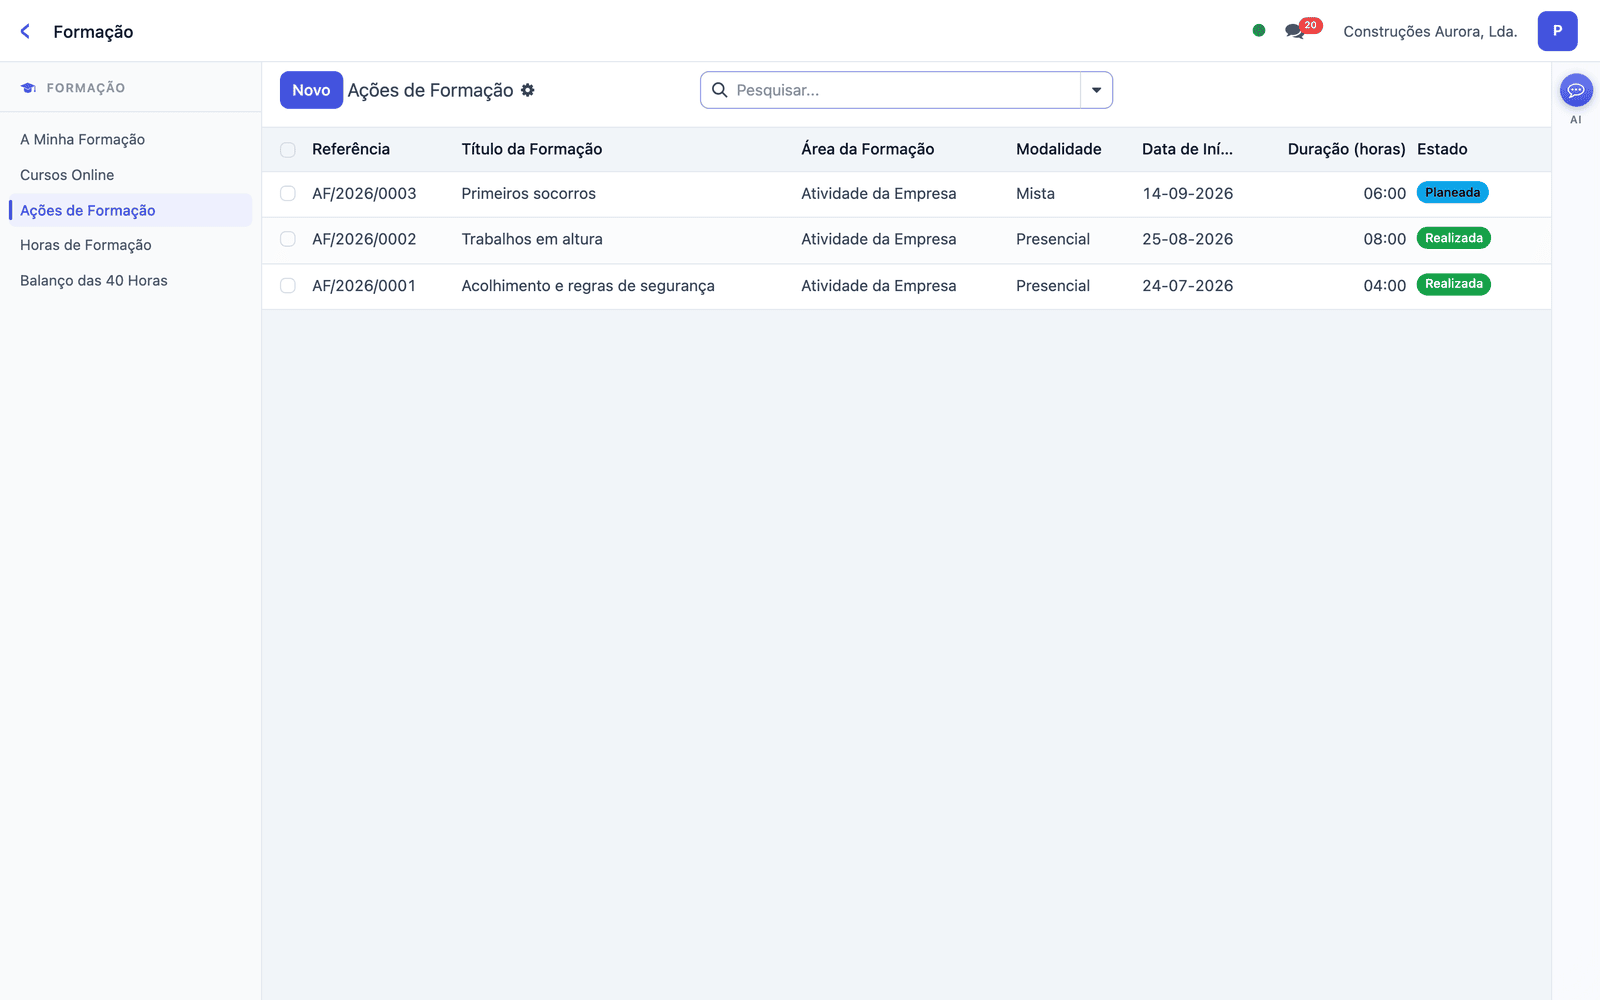
| Training Sessions | Each session with date, format, trainer and participants. When marked as completed, the hours are recorded on each participant's record. |
| Online Courses | Content (video, document, text) with a final assessment, for those who cannot leave the site. |
| Training Hours | The record of all hours, from any source (session, online course, manual entry). |
| 40-Hour Balance | Per employee: hours completed this year, target, hours owed and credit — who has already met it and who still has hours to go. |
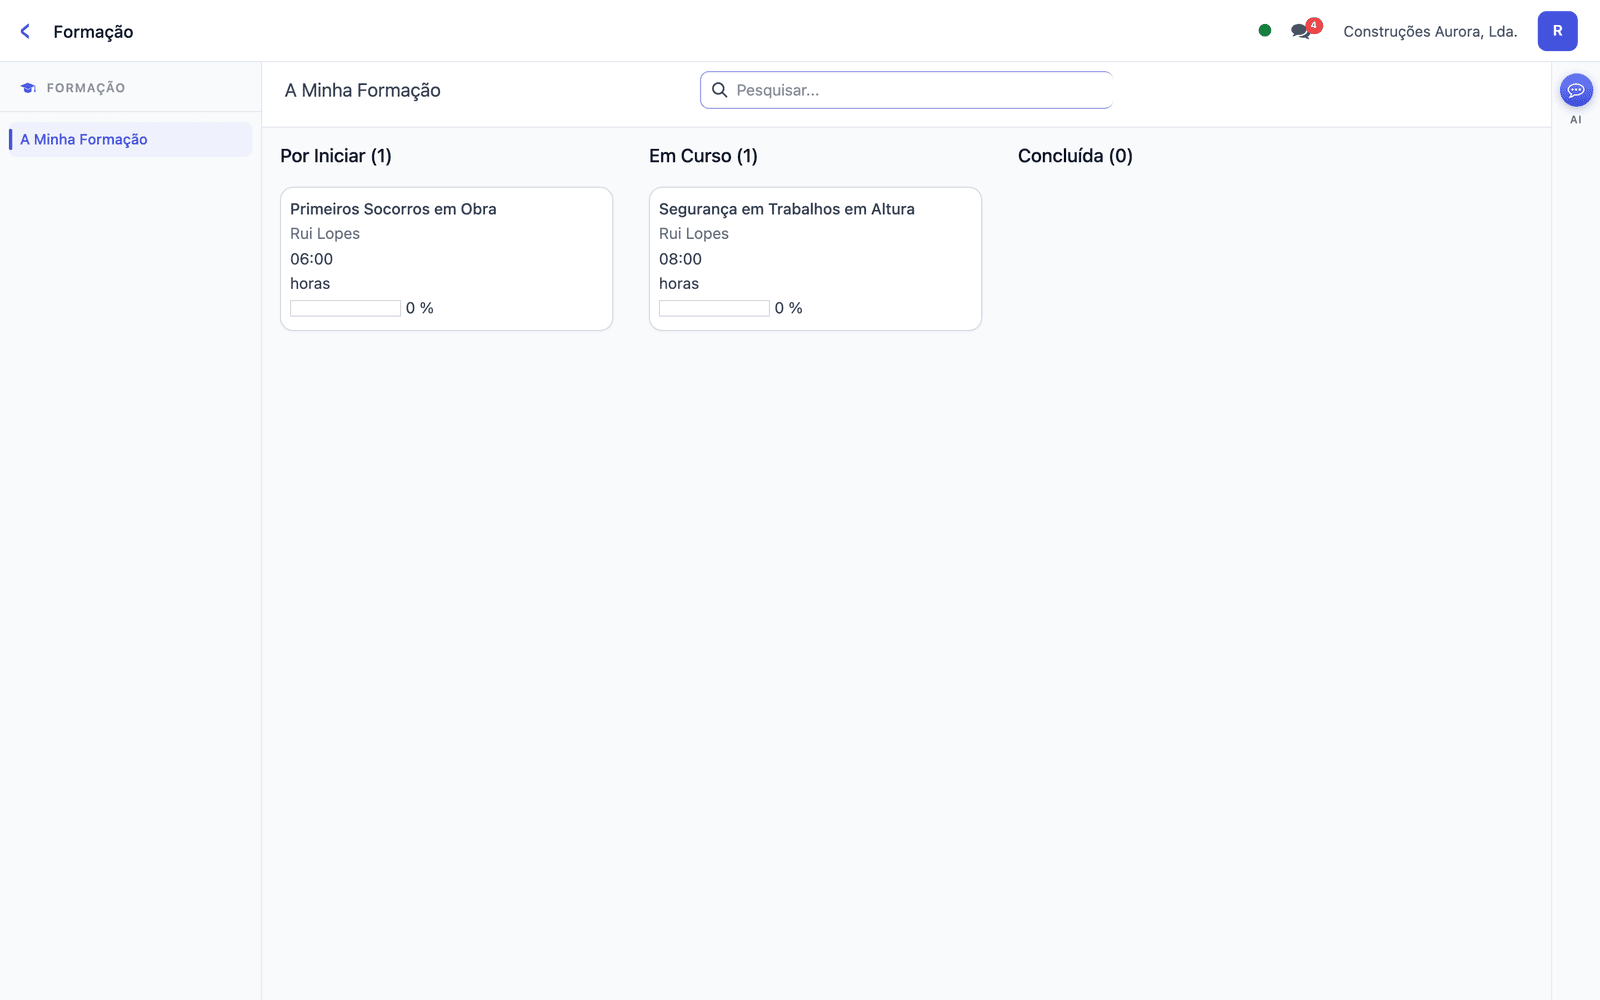
| My Training | What the employee sees: the courses they are enrolled in and their progress. |
13 Documents
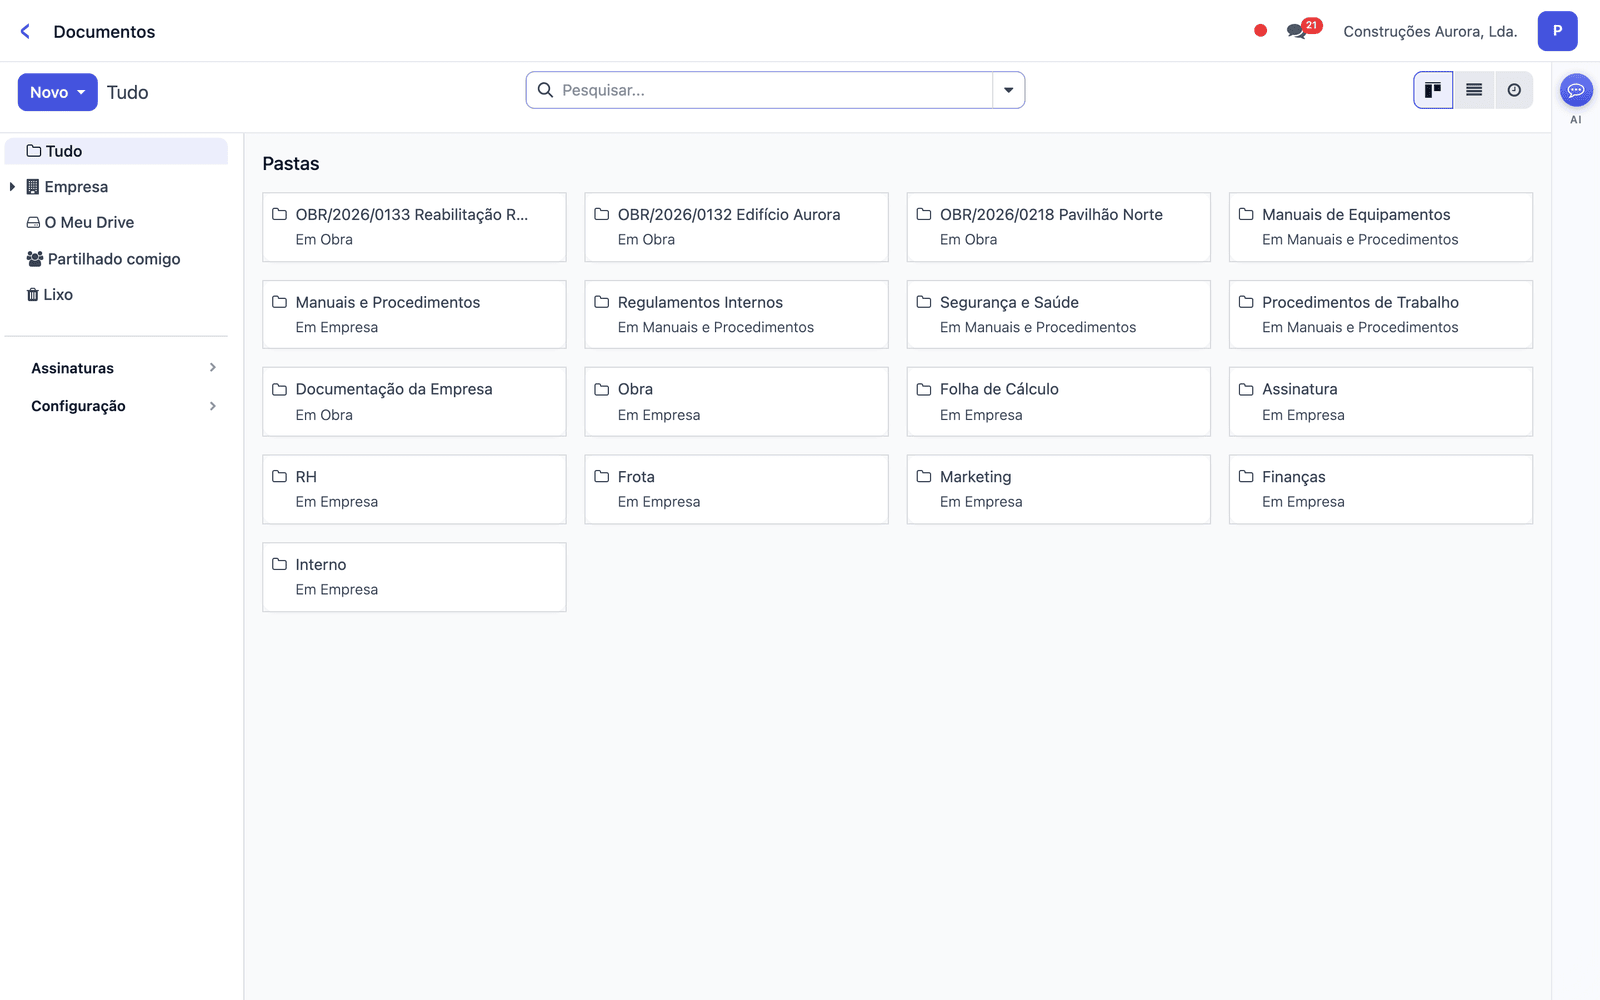
The Documents app organises the company's and each employee's paperwork in folders, with the right privacy for each one. Drag files into the folder or use “New” to upload, create a spreadsheet or request a signature.
Private HR folder
Each employee has their own folder: payslips and contracts filed there are seen only by the employee and by HR.
Manuals and Procedures
The folder for the whole company: internal regulations, work procedures, health and safety, equipment manuals.
One folder per site and spreadsheets
Each site gets its own folder (drawings, permits, photographs). Spreadsheets open and can be edited within the app.
Internal electronic signature
The Company Manager requests signatures on internal documents (regulations, acknowledgements) and sees who has already signed. Simple signature, for internal use.
14 Settings: users and subscription
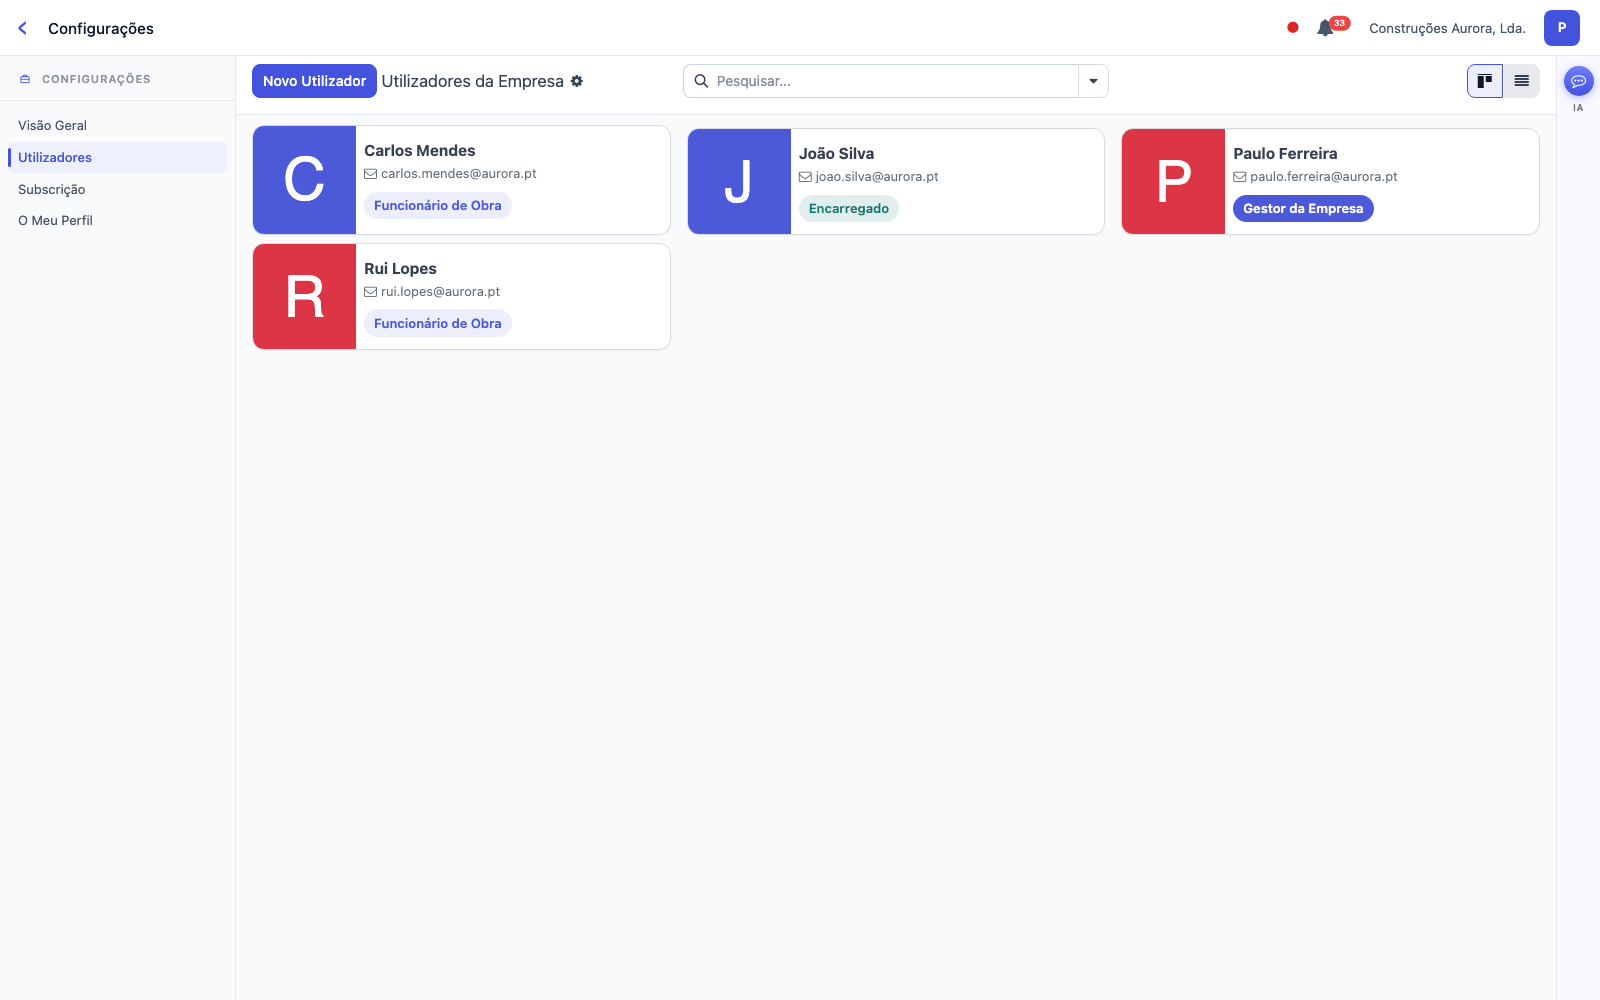
The Settings app brings the management of the company account together in three menus:
- Overview — how many users there are per profile, the subscription seats and the company settings (name, AI assistant).
- Users — click “New User”, enter the name and email, choose the profile (section 2) and, for those in the field, the site. The person receives an email invitation to set their password. This is also where you change a profile or deactivate an access.
- Subscription — the plan, the seats (management and site), the AI credits and the invoices. We accept card and SEPA direct debit.
The fourth menu, My Profile, is each person's own record (section 6): it is the only one the other profiles see in this app.
The assistant that answers inside the app, and the questions we are asked most often.
15 AI Assistant
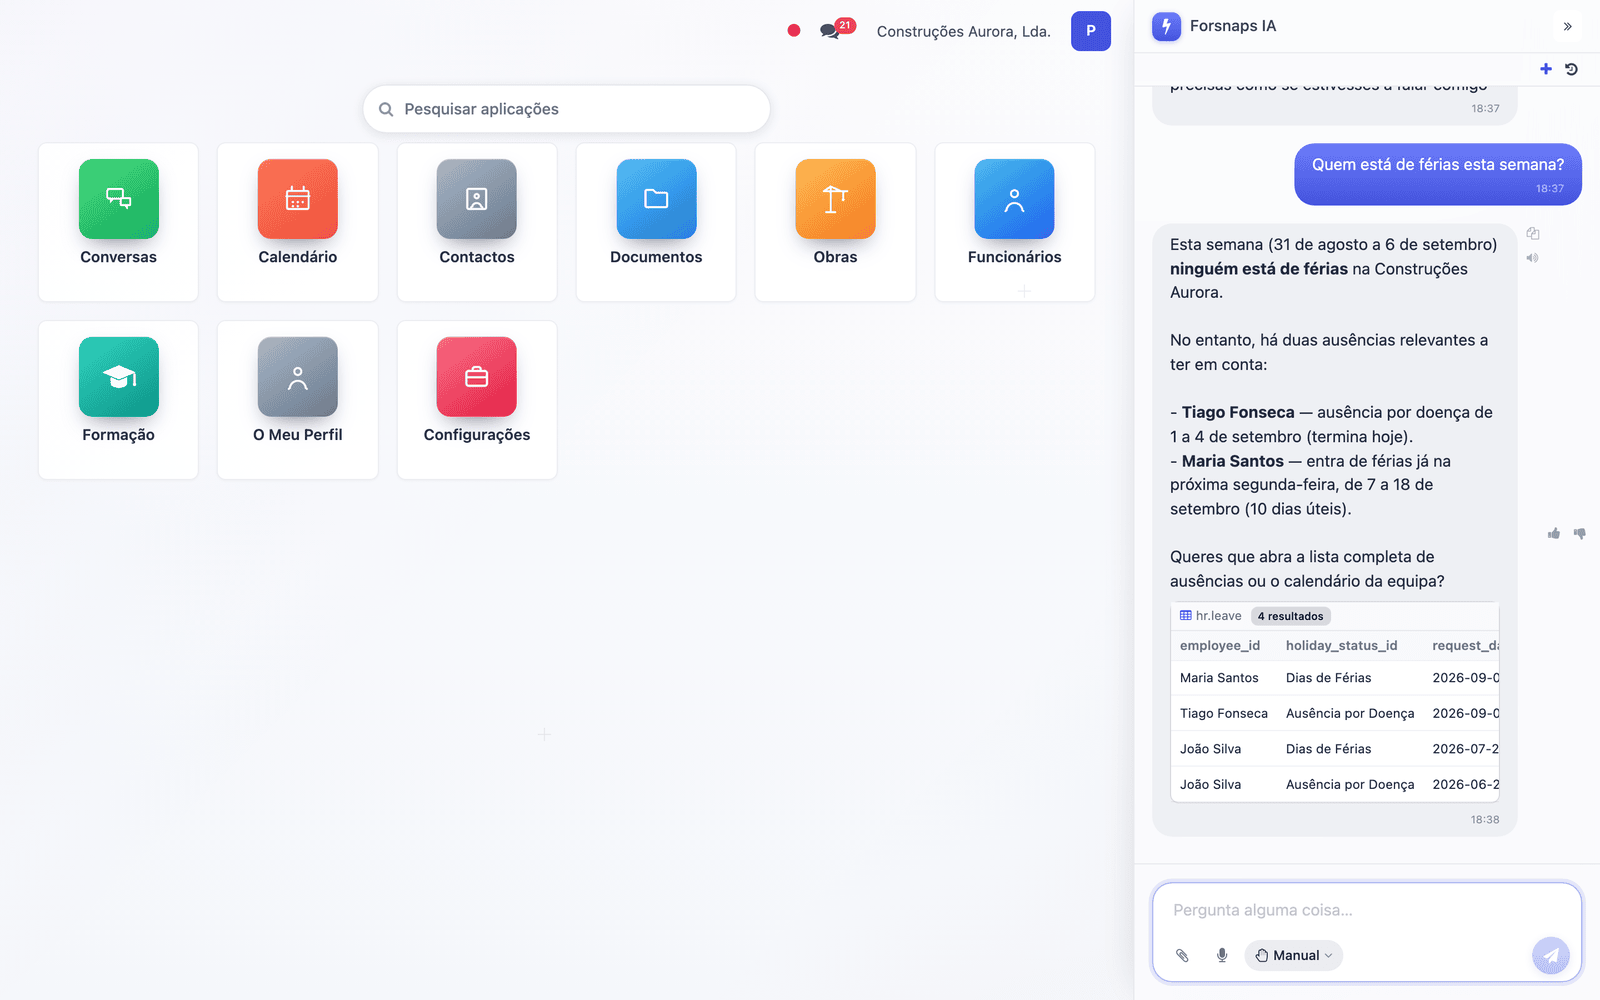
Recato lives in the panel on the right-hand side — open it with the “AI” tab at the edge of the screen. Type (or dictate) in plain language, as if you were talking to a colleague: it looks up the data you have access to, answers with the records it finds and, if you ask, opens the right screen. It also forecasts when a site will be finished and prepares quotes (section 9).
View
“Who is on holiday this week?”, “how many hours did the Rua Augusta team work?”
Navigate and act
“Open Rui Lopes's record”, “take me to the expenses awaiting approval”. In autonomous mode it can also carry out tasks for you
Voice and attachments
Dictate by voice, attach images or PDFs to the conversation and hear the answers read aloud
16 Frequently asked questions
Need help?
Our team is available to support you in using the Forsnaps platform.
Contact support Free trial